Last updated: October 9, 2026
A Christmas tree footprint craft turns one tiny foot into a keepsake you will still want on the wall ten years from now. Below you will find ten ideas you can make this afternoon, plus the supplies, the method, and the tricks that keep the print sharp instead of smudged.
Everything here works for babies who need a helper, toddlers who want to do it themselves, and big kids who still want in on the fun.
How to Make a Christmas Tree Footprint Craft
The whole trick is turning the foot upside down. Press the foot onto the paper with the heel at the top and the toes at the bottom, and you get a narrow point with a wider base, which reads as a tree almost instantly.
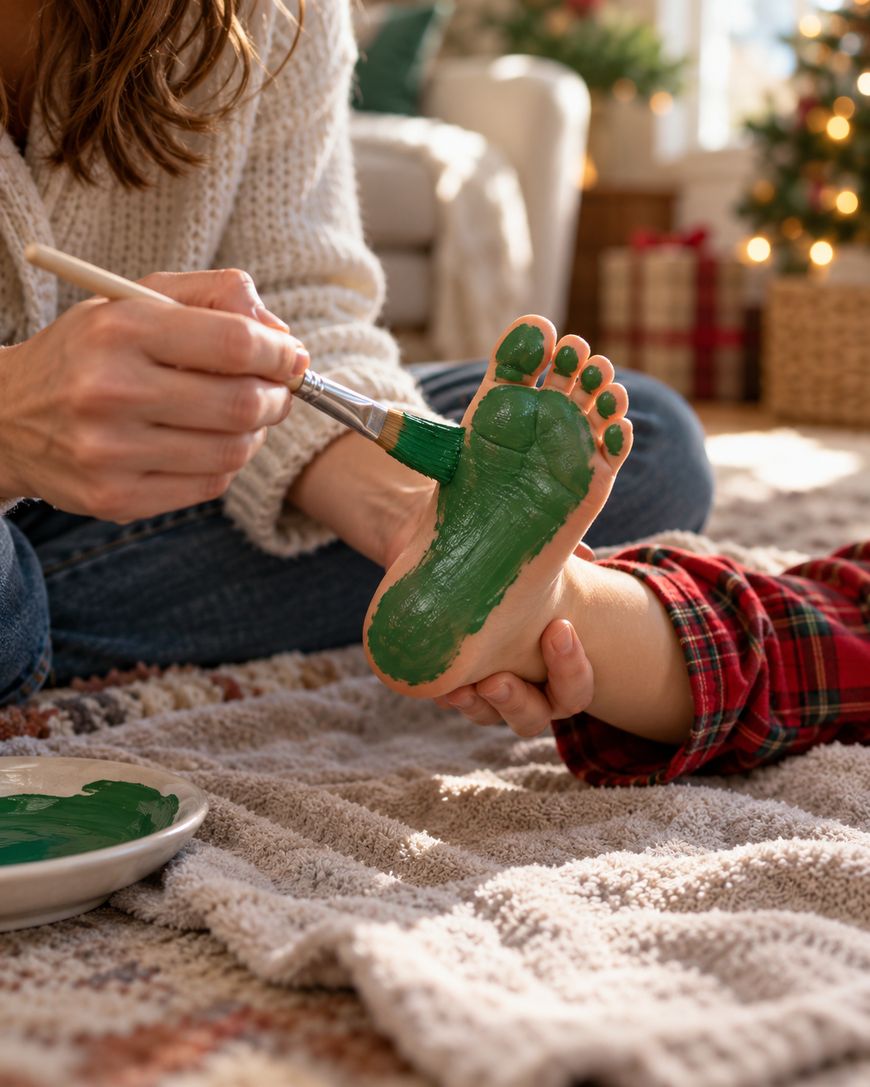
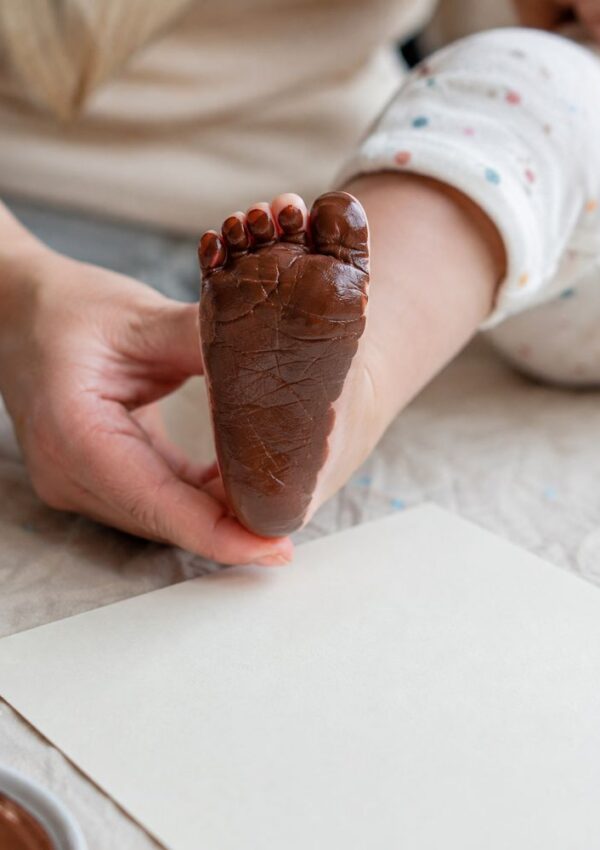
Start by painting a thin, even coat of green paint over the sole of the foot with a soft brush. A brush gives you far more control than dipping the foot into a tray, and it keeps the paint out of the spaces between the toes where it tends to pool.
Bring the paper up to the foot rather than lowering the foot onto the paper. You will get less sliding that way, especially with a wriggly toddler on your lap.
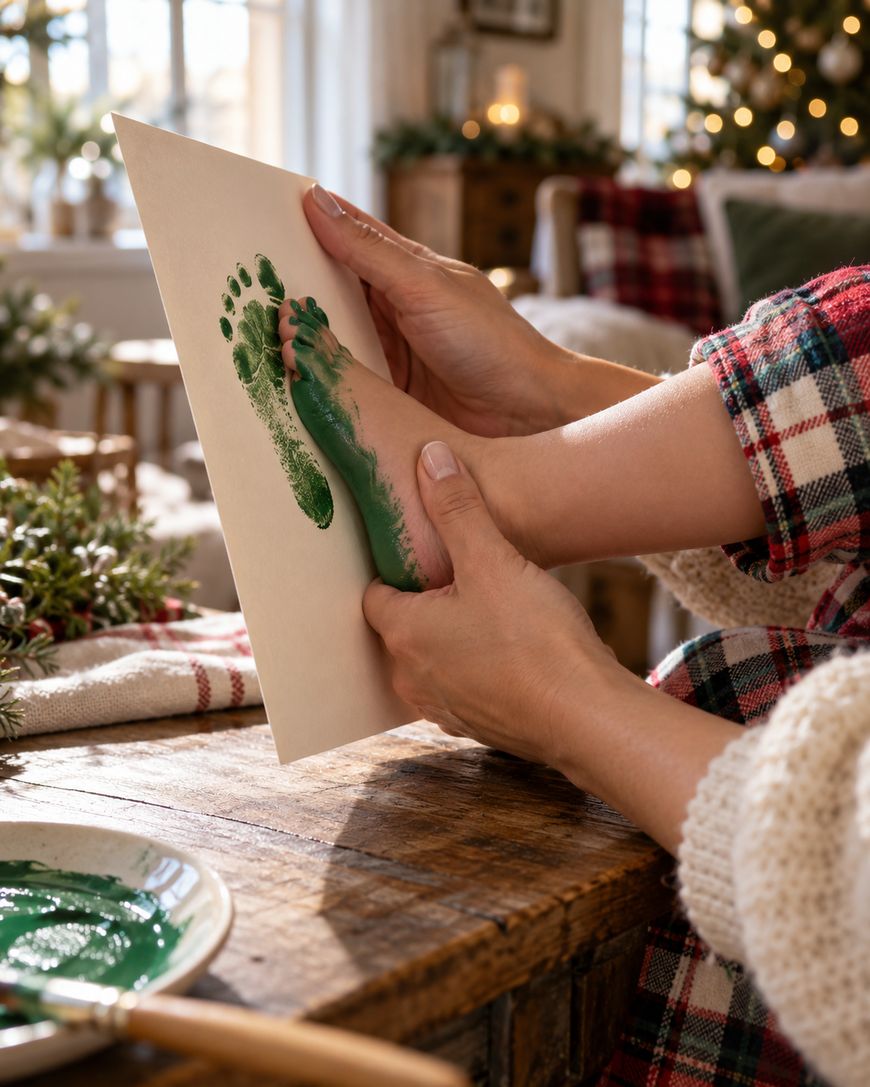
Press down gently across the heel, the arch, and each toe for a few seconds, then lift the paper straight up. Have a damp cloth and a towel ready before you start, because the window between a finished print and green footprints on your rug is very short.
Once the print is dry, add a trunk under the toes, a star above the heel, and as many dots of color as your child wants.
What You Need for a Christmas Tree Footprint Craft
You almost certainly have most of this already. Thick paper or cardstock holds a wet print without buckling, and it stands up to being framed later, which thin printer paper never does.
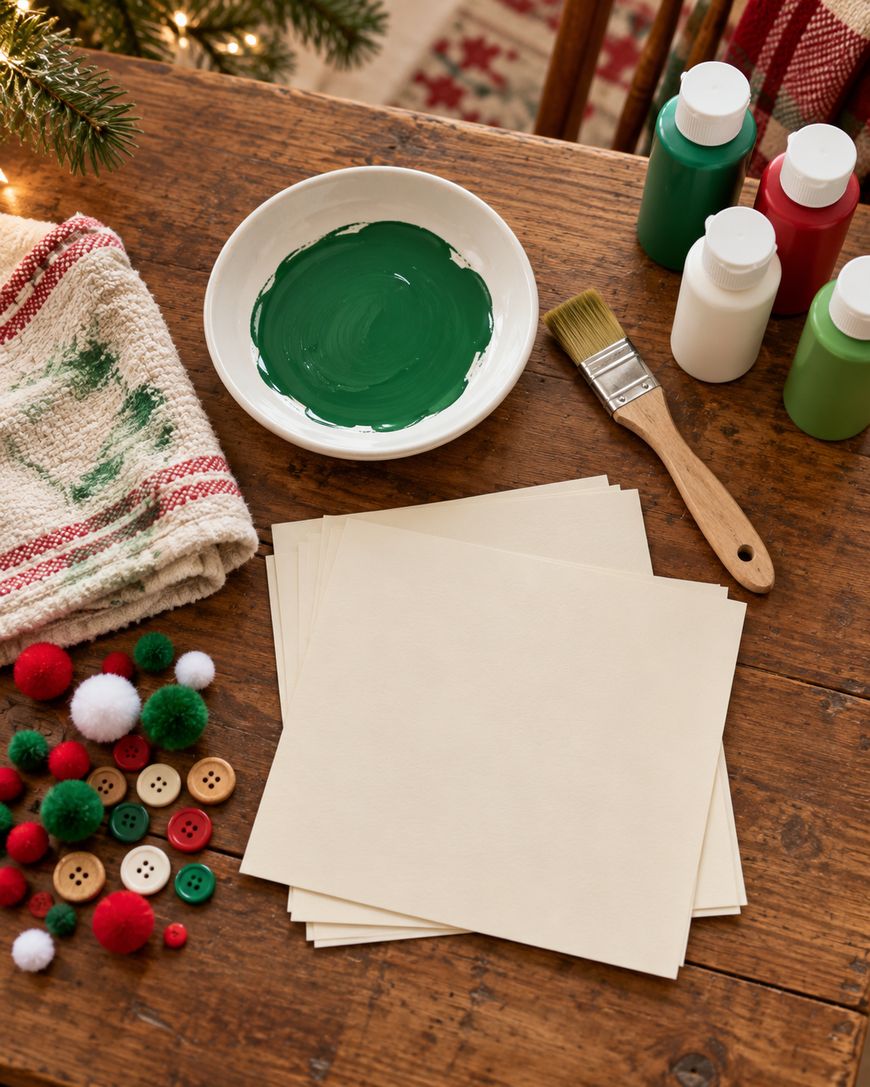
Choose paint that is labeled non toxic and washable, and follow the age guidance printed on the bottle rather than guessing. Washable paint matters more than the color does, since it comes off skin with warm water and a cloth instead of a scrubbing session.
You will also want a soft brush, a shallow tray for mixing, baby wipes, and an old towel under the whole setup. A second adult is worth more than any supply on this list if your child is small enough to squirm.
For the extras, gather whatever you have in the craft drawer. Buttons, pom poms, sequins, star stickers, and a gold or silver marker all work beautifully as ornaments and toppers.
1. The Classic Green Footprint Tree
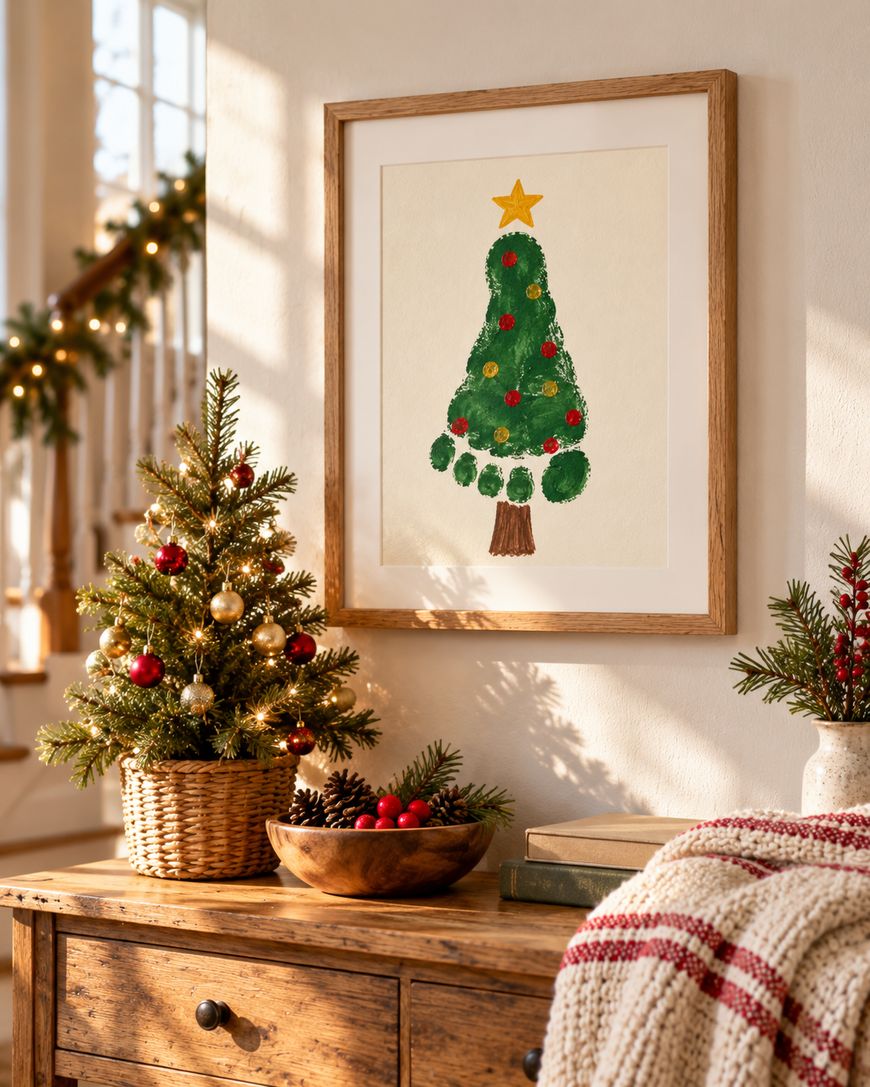
This is the version to start with, and it is the one you will end up repeating every year. One green footprint on white cardstock, a short brown trunk drawn under the toes, and a yellow star above the heel is the entire craft.
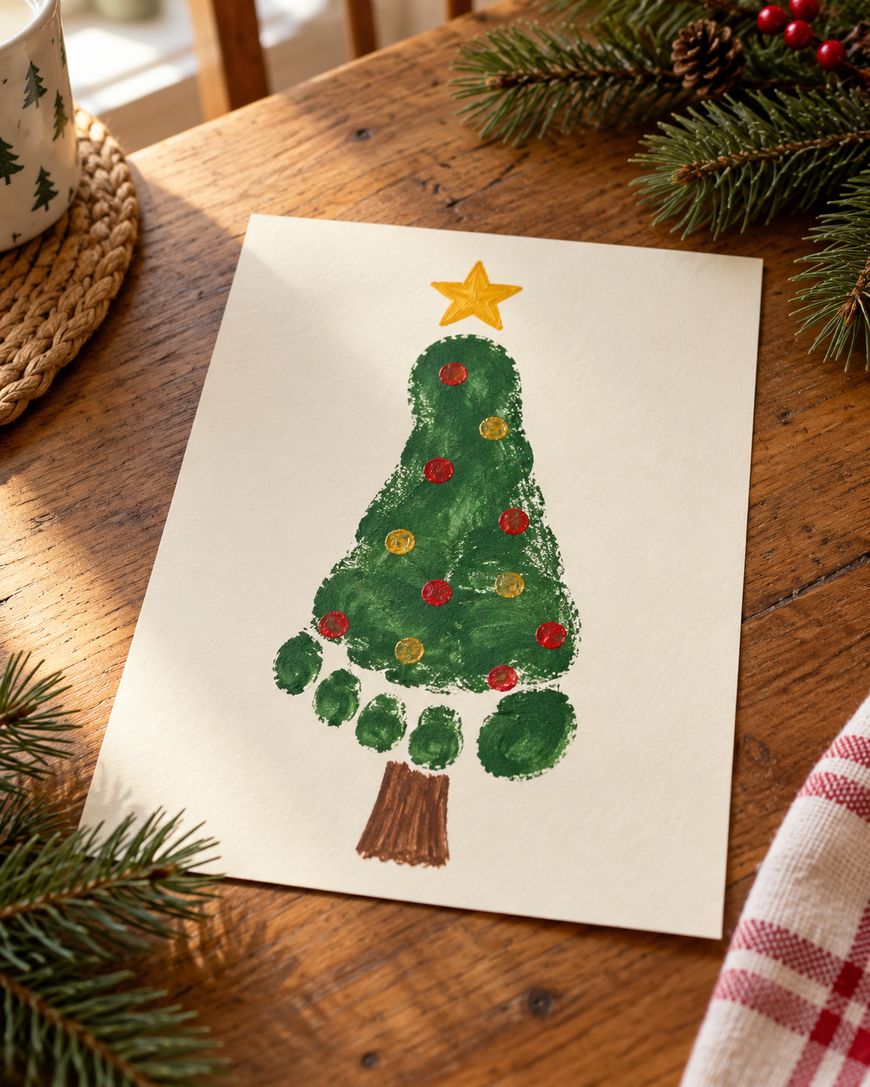
Keep the trunk short and slightly wider than you think it needs to be. A skinny trunk makes the tree look like it is floating, while a stubby one grounds the whole shape.
Let the green dry completely before adding anything on top of it. Wet paint pulls up onto the brush and turns your crisp tree into a smear, and it only takes a few minutes to avoid.
Add dots of red, gold, and blue with the end of a cotton swab for ornaments. Space the dots unevenly so the tree looks hand decorated rather than printed, which is exactly the charm you are going for.
Write your child’s first name and the year in the bottom corner in your own handwriting. That single line is what turns a craft into something worth keeping.
2. Footprint Tree With Fingerprint Ornaments
Once the green print is dry, this version puts your child back to work with their own fingertips. Dip one finger into red paint, press it onto the tree, wipe, and repeat with the next color until the branches are covered.
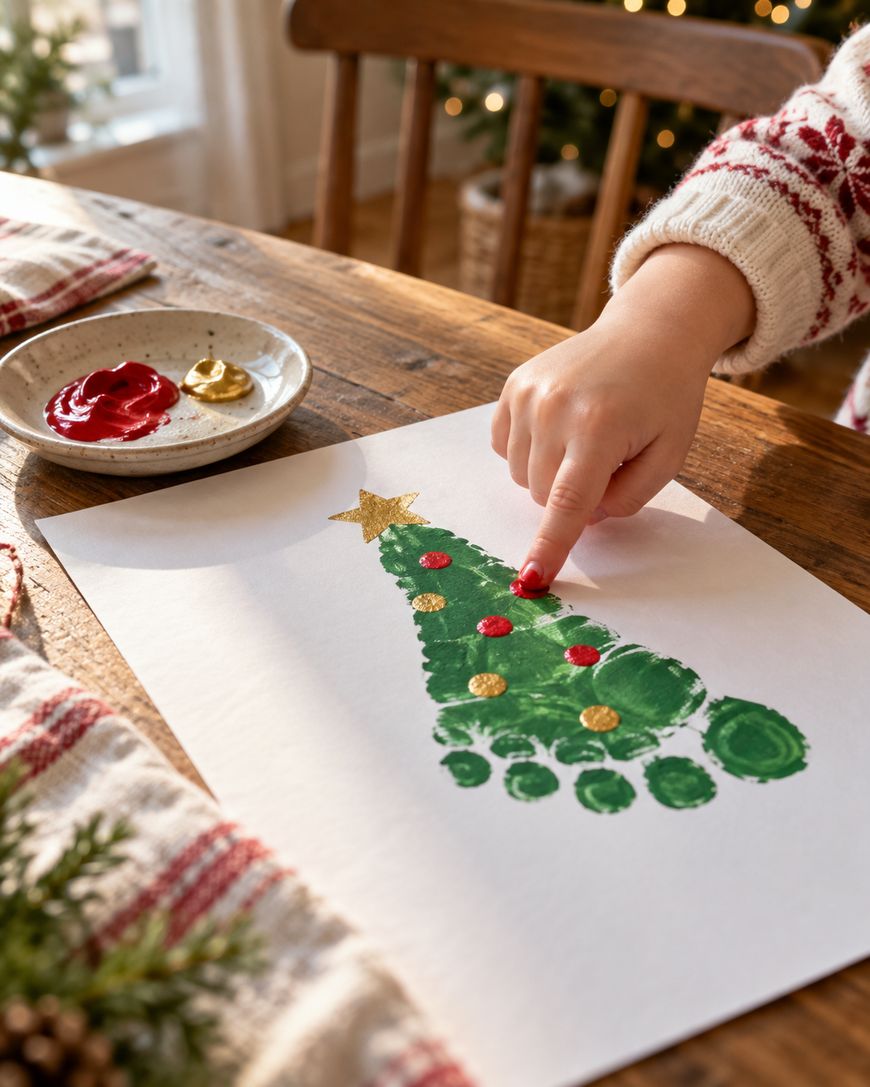
Fingerprints give you perfectly round ornaments without any of the fiddly work of gluing on buttons. They also stay flat, which matters if you plan to frame the finished piece or slide it into a card.
Younger toddlers do well with just two colors, since choosing between five bowls of paint tends to end with all five mixed into one brown one. Older kids can go as elaborate as they like, adding a garland of dots that loops around the tree in a zigzag.
Finish with a fingerprint star at the top in gold or yellow. Press firmly and give it a slight twist so the print spreads into something wider and more star shaped than a plain dot.
3. Handprint Star on Top
Here you combine two prints into one piece, and it works especially well when you have more than one child. The footprint becomes the tree and a smaller handprint sits above it as the star.
Paint the palm and fingers in yellow or gold, then press the hand down just above the heel of the footprint with the fingers spread wide. Five spread fingers read as star points without you needing to draw a single line.
If the handprint comes out too large for the tree, use a hand from the youngest child in the house and the foot from the oldest. The size difference is the whole point, and it makes for a sweet caption when you write both names underneath.
Let the green tree dry fully before the handprint goes on top, or the two colors will blend into a muddy olive at the overlap. Ten minutes of patience saves you starting over.
4. A Sibling Footprint Forest
Instead of one tree, line up a print from every child in the family across a wide sheet of paper. You end up with a little forest that shows exactly how big each of them was that year.
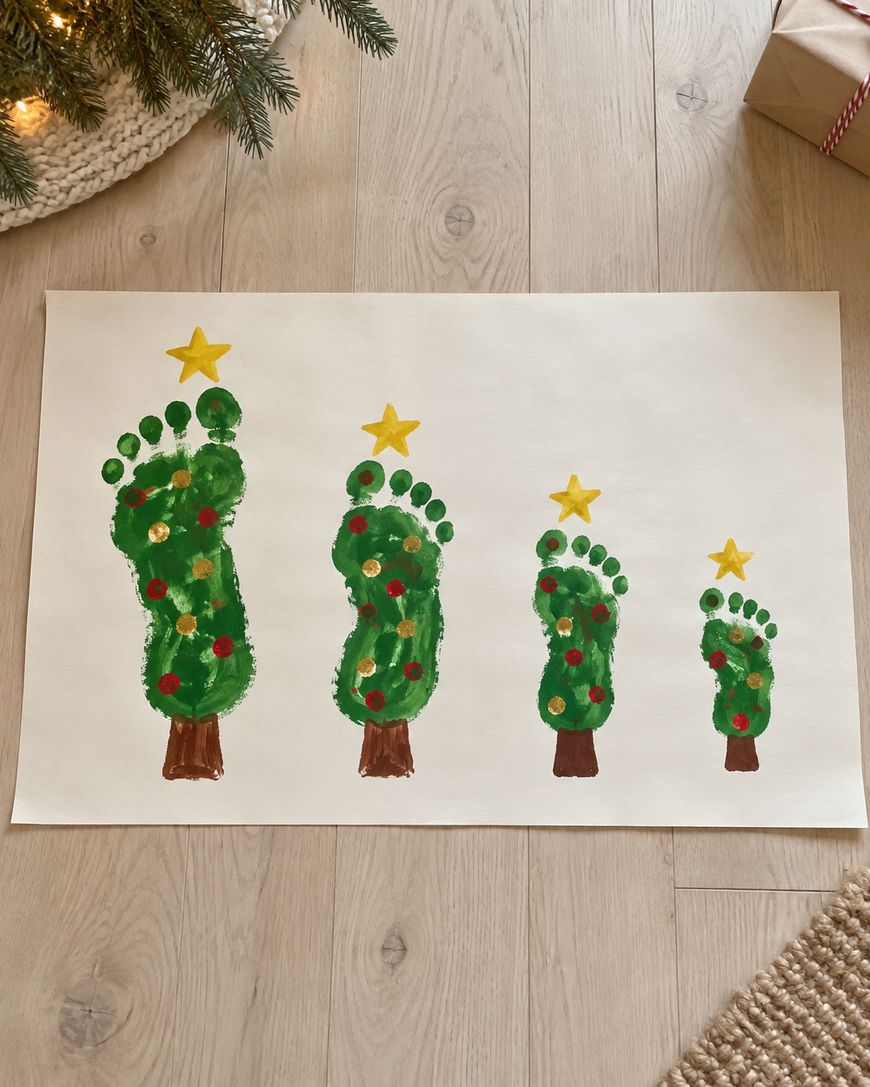
Work from largest to smallest, left to right, and leave a finger’s width of space between each print. Crowding them together makes the piece look busy and hides the size difference you want to show off.
Vary the greens slightly if you have more than one shade, or mix a little white into the paint for the smaller trees. The variation keeps the row from looking like a repeating stamp.
Give each tree its own trunk and its own star, then write the matching name under each one. Add the year once, in the center at the bottom, rather than under every tree, so the piece stays clean.
This one is worth doing on a long, narrow sheet so it can hang above a doorway or along a shelf.
5. Footprint Tree Christmas Cards
A Christmas tree footprint craft makes a card that grandparents genuinely keep, and you can produce a batch in one sitting. Fold cardstock in half first, then print directly onto the front of the folded card.
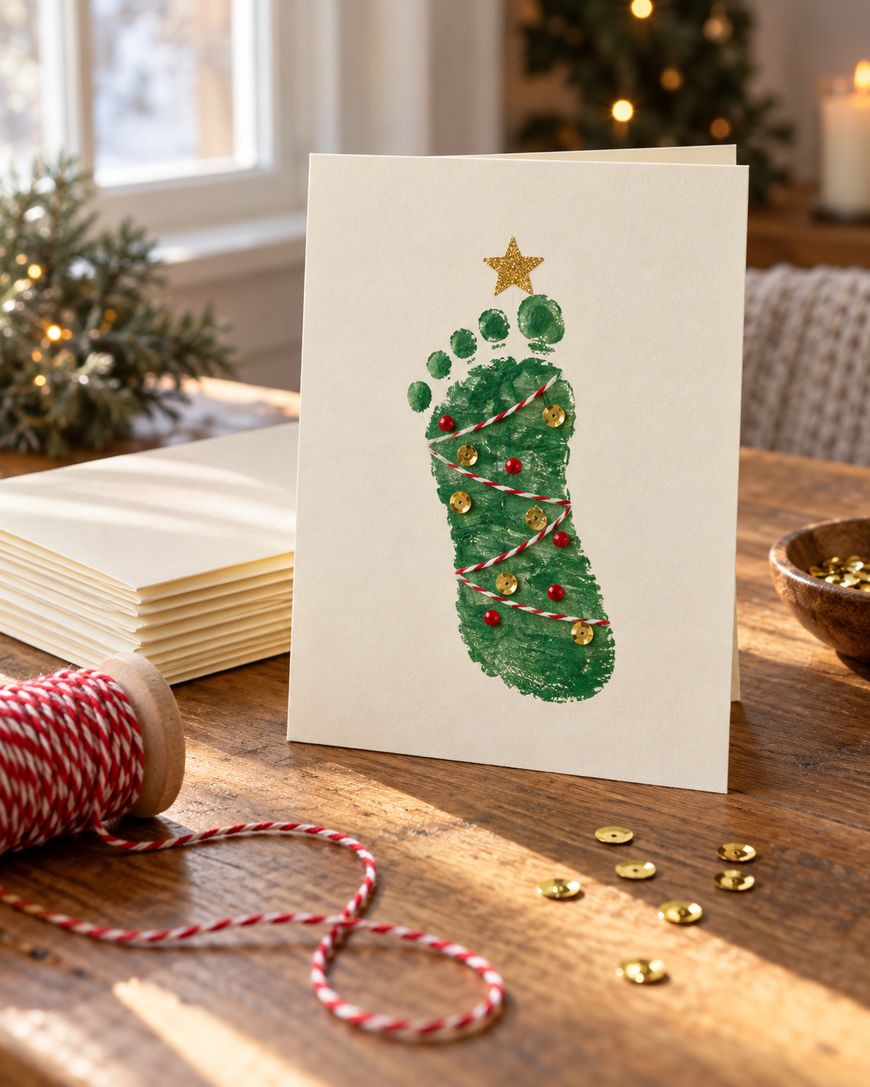
Work in an assembly line. Paint the foot, print onto four or five cards in a row before the paint runs out, then wipe the foot and reload the brush.
Keep the trees small by using a younger child’s foot if you have the choice, since a big print can run off the edge of a standard card. If the print does overhang slightly, trim the card down to a custom size rather than fighting it.
Add the ornaments and star once every print is dry, and leave the inside blank for your own message. Slip a sheet of scrap paper inside the fold while printing so wet paint does not transfer to the inside of the card.
Address them the same evening if you can, because a stack of finished cards has a way of migrating to the bottom of a pile.
6. Salt Dough Footprint Ornaments
This one gives you something with weight to it, and it hangs on the tree instead of the wall. Roll out salt dough, press the foot in to leave an impression, and cut around it into a circle or a rough tree shape.
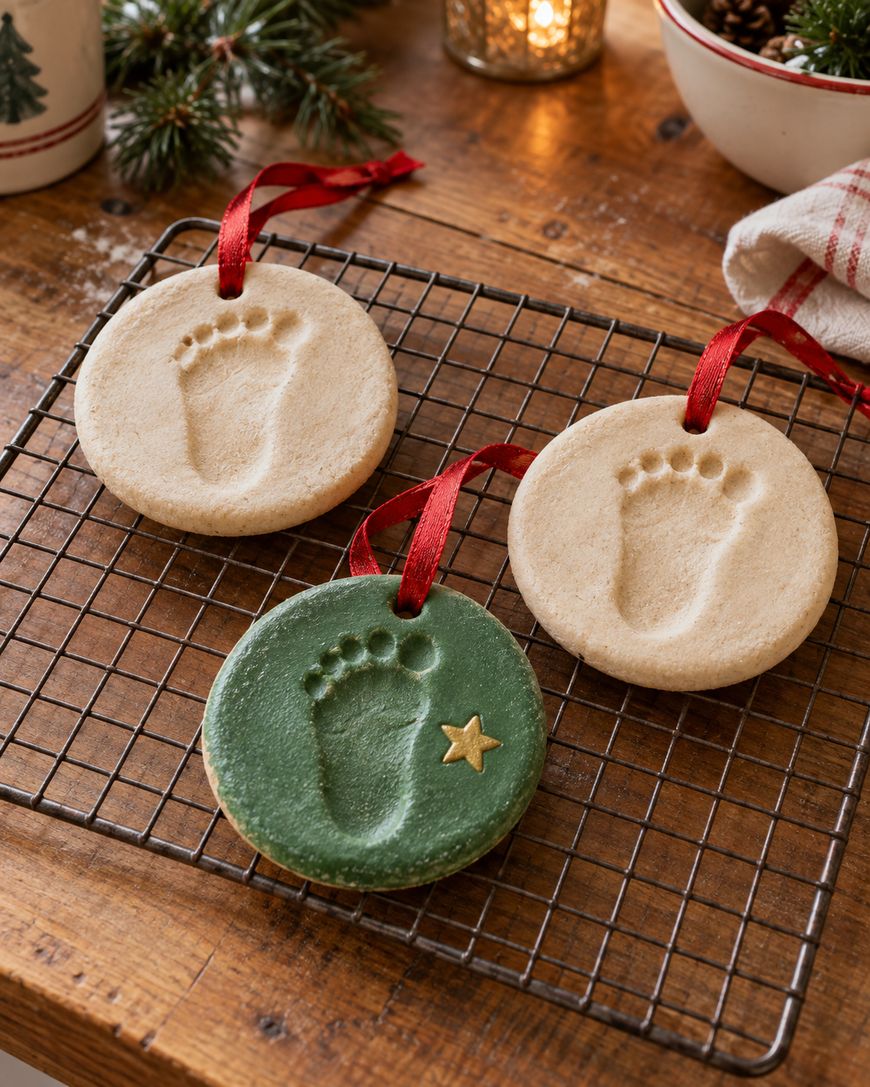
Make the hole for the ribbon before the dough dries, using a straw pressed through the top. It is nearly impossible to add cleanly afterward.
Dry the ornaments in a low oven following a salt dough recipe you trust, or leave them somewhere warm to air dry over several days, turning them once a day so they dry evenly. Rushing this step is the main reason salt dough cracks.
Once they are hard, paint the impression green, add a trunk and a star, and seal the whole thing with a coat of clear varnish or mod podge. The seal is not optional if you want the ornament to survive being packed away and unpacked each year.
Write the year on the back before you seal it, since you will not remember otherwise.
7. Canvas Footprint Tree Wall Art
Printing onto a stretched canvas rather than paper gives you a finished piece with no framing required. Paint the canvas a solid background color first, let it dry, and then add the footprint tree on top.
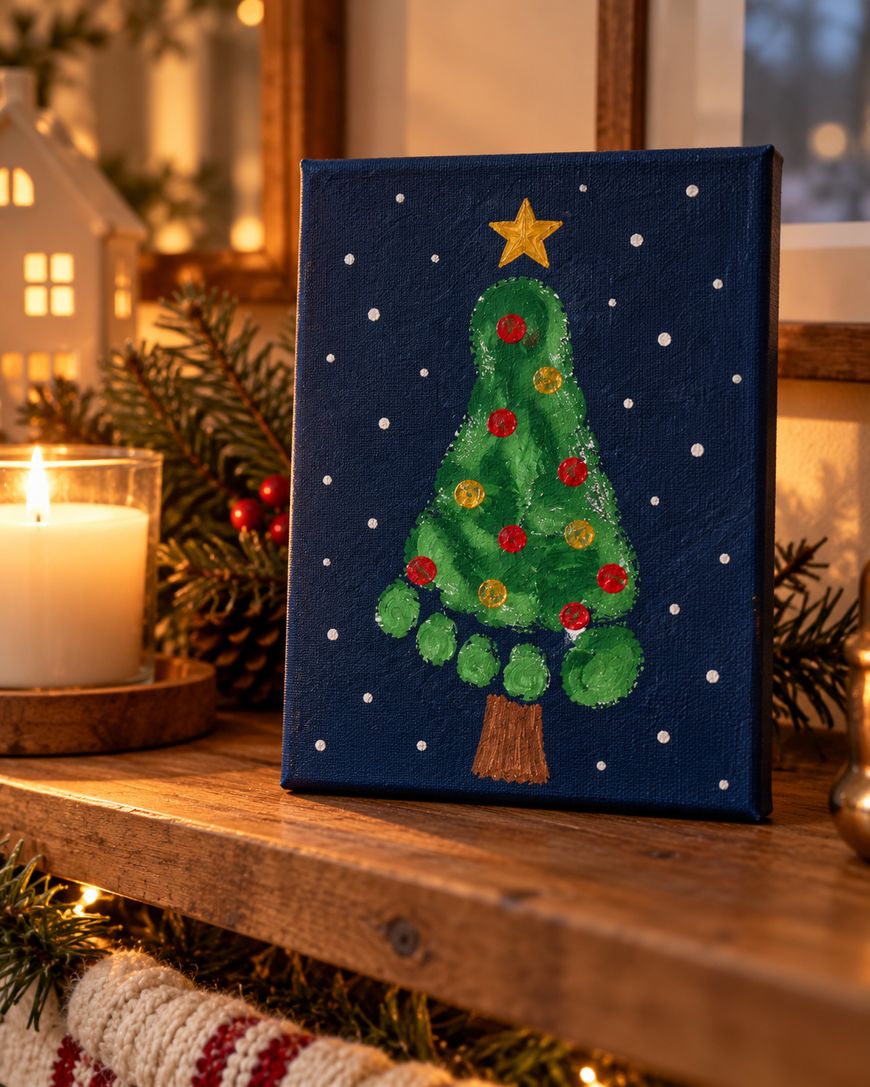
Deep red, navy, or cream backgrounds all make green stand out. A white canvas works too, though the print can look a little unfinished against it.
Canvas has more texture than paper, so press a little longer and a little firmer to get paint into the weave. Expect a slightly speckled print, which most people prefer anyway since it looks brushed rather than stamped.
Add a hanging ribbon, some white dots for falling snow, and the year along the bottom edge. Sign it with your child’s initials in the corner the way a painting would be signed.
A row of these on a shelf, one from each year, becomes the sort of decoration people stop and look at properly.
8. Footprint Tree Gift Tags
Small hands and small feet make small tags, and these turn ordinary wrapped gifts into something personal. Print onto cardstock, let it dry, then cut the paper down into rectangles with one tree per tag.
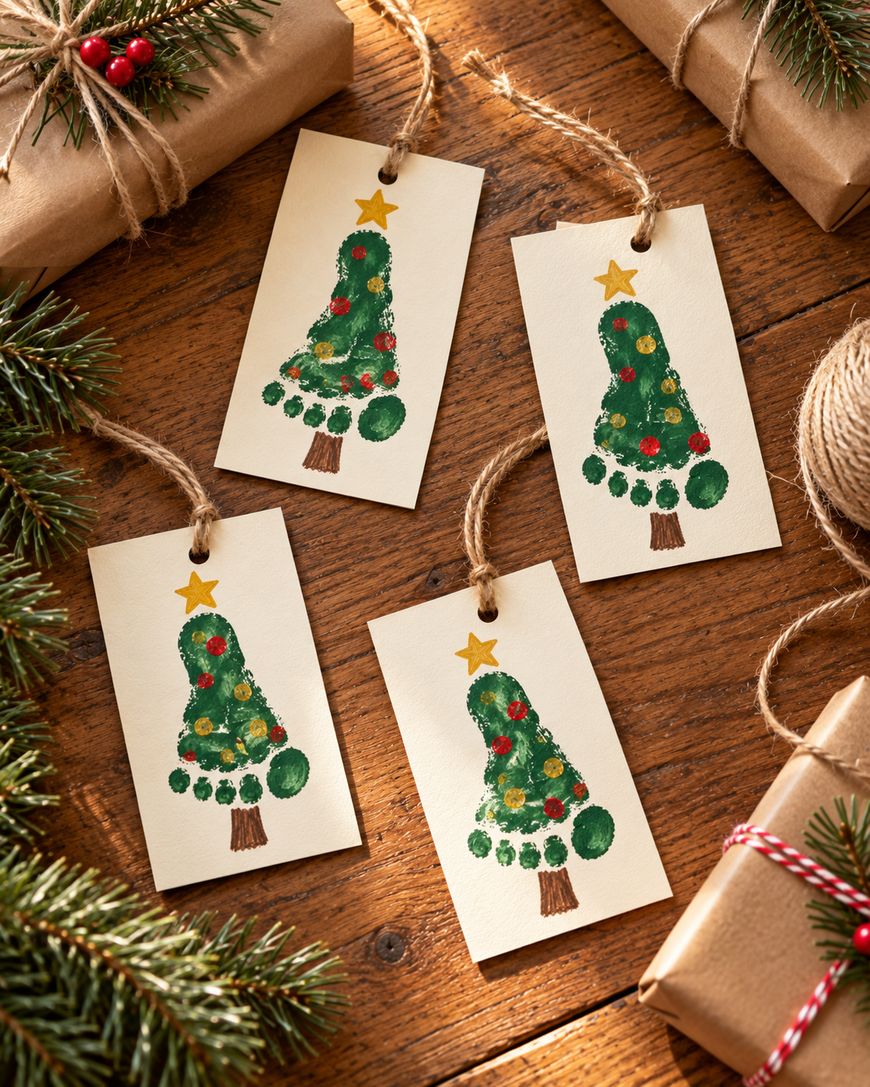
Use a baby’s foot for these if you have one available, since the scale is naturally right for a gift tag. For an older child, print onto the paper as normal and simply cut closer around the tree.
Punch a hole in the corner and thread through baker’s twine or thin ribbon. Round off the corners with scissors so the tags do not curl and fray in the gift pile.
Leave enough blank space at the side to write a name. A tag you cannot actually label is a decoration, not a tag.
These are also a nice way to use the prints that came out slightly wonky, since a small crop hides a lot.
9. Glitter and Sequin Footprint Tree
For the child who wants maximum sparkle, this version leans all the way in. Sprinkle fine glitter over the footprint while the green paint is still wet, then tip off the excess onto a folded sheet of paper.
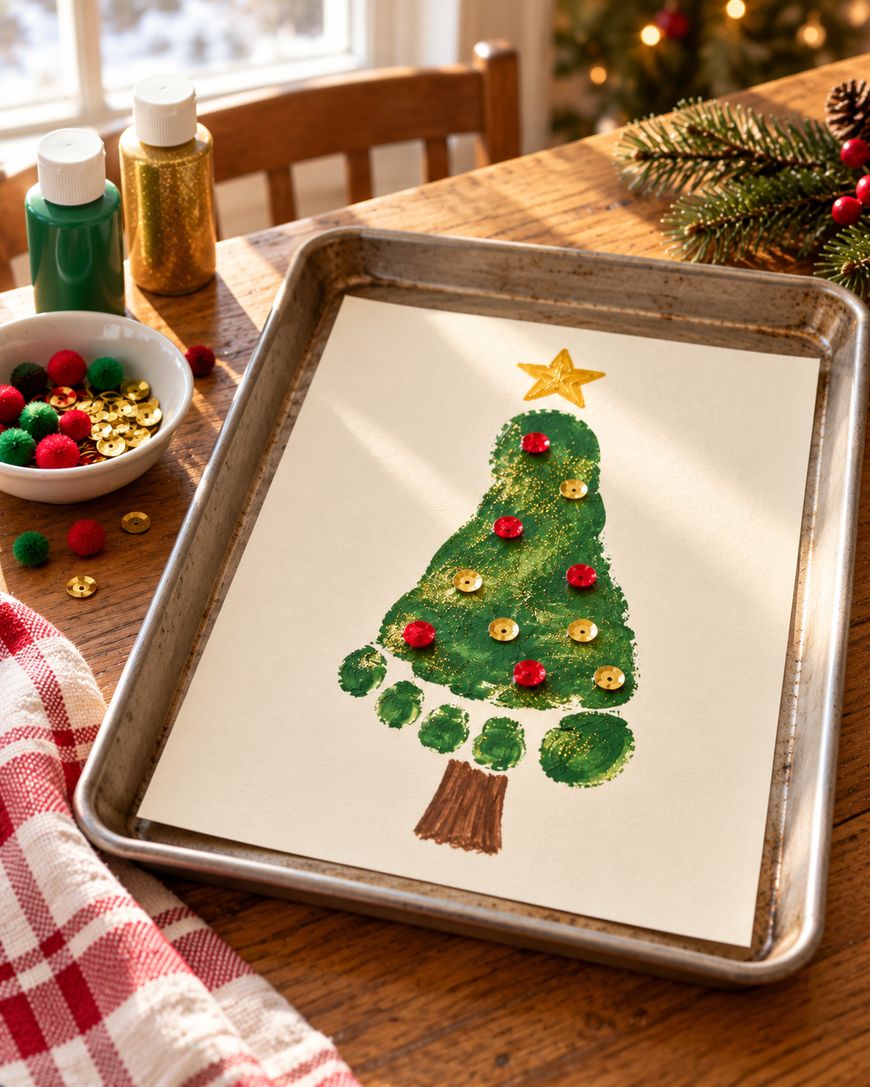
The wet paint does the sticking, so you do not need any glue for the base layer. Tipping the extra onto folded paper lets you pour it straight back into the pot instead of losing half of it to the table.
Once dry, glue on sequins and small pom poms as ornaments with a dot of school glue. Press each one and hold for a moment, since sequins slide around more than you expect.
Do this one on a tray rather than a table, because glitter travels further than any other craft supply in the house. A shallow baking tray keeps the whole mess contained and makes cleanup a matter of tipping rather than wiping.
Finish with a large sequin star or a stick on gem at the top.
10. A Year by Year Footprint Keepsake
The last idea is really a plan rather than a project. Make the same simple green footprint tree every December, always on the same size paper, and always with the name and year in the same corner.
Keep them together in one folder or a single large frame with space for more. Watching the tree grow from a print the size of your thumb to one that barely fits the page is genuinely moving by the fourth or fifth year.
Pick a date and stick to it, such as the first weekend of December or the day you put the tree up. Doing it at the same point each year keeps the sizes comparable and stops the tradition from quietly slipping.
Photograph each one as you go so you have a backup, since paper keepsakes and small children share a house at their own risk. A folder on your phone takes two seconds and saves a lot of heartache.
Tips for Getting a Clean Print Every Time
A thin coat of paint beats a thick one, every time. Thick paint squeezes out at the edges and blurs the outline, which is the single most common reason a print does not look like a tree.
Sit your child on a chair or on your lap with the foot dangling, rather than asking them to stand. Standing puts their full weight through the print and spreads the foot wider than you want.
Keep the toes slightly apart with your fingers as you press, since toes that squash together turn the base of the tree into a solid blob. A little separation gives you those distinct points along the bottom.
Print two or three at once while the paint is already on, so you have a spare if the first one slides. It costs you nothing extra and takes the pressure off getting it perfect first try.
Wash the paint off promptly with warm water and a soft cloth, and check the paint label for its own removal advice before you start.
Why a Christmas Tree Footprint Craft Is Worth the Mess
Twenty minutes and one green foot buys you a decoration nobody else has, which is not something you can say about much in December. The finished piece costs almost nothing, and it fills the gap on the wall that store bought decor never quite does.
There is a practical side too. A craft that produces cards, tags, and ornaments takes real items off your holiday shopping list, and the recipients tend to like them more than anything you could have bought.
The size is the part that gets you later. A footprint is a measurement, and a Christmas tree footprint craft quietly records how small your child was in a way a photograph somehow does not.
Kids also get something out of the process itself, from the squeeze of paint on the sole of the foot to placing every ornament exactly where they want it. Let them make the decorating decisions, even the questionable ones, because a tree they designed is a tree they will be proud of.
Christmas Tree Footprint Craft Questions Answered
What kind of paint should we use on skin?
Use a paint labeled non toxic and washable, and read the label’s own age guidance before you use it on a baby or toddler. Washable poster and finger paints are the usual choice because they lift off skin with warm water rather than scrubbing.
If your child has sensitive skin, test a small dot somewhere else first and wash it off after a few minutes. Wash the paint off promptly once the print is done rather than letting it dry on the foot.
What is the best paper for footprint crafts?
Cardstock or thick craft paper handles wet paint without warping, which thin printer paper cannot do. If you plan to frame the finished piece, cardstock is worth the small extra cost.
For ornaments, skip paper entirely and use salt dough or air dry clay. For cards, buy blank folded cards so you are not cutting and scoring yourself.
How do you keep a wriggly toddler still?
Sit them somewhere with a distraction in their hands, such as a book, a snack, or a toy they only get out at craft time. Working at their level rather than asking them to hold a pose does most of the work for you.
Have every single thing ready before the foot gets painted, since the moment you turn away to find the brush is the moment they stand up. If they are having none of it, stop and try again another day rather than forcing it.
Can we do this with a newborn?
Yes, and newborn prints are often the sweetest, though they need two adults and a gentle touch. Wait until the baby is calm or sleepy, paint a very thin layer, and bring the paper to the foot rather than moving the baby.
Expect a curled print, since newborns naturally curl their toes, and know that a partial print still looks like a tree. Wipe the foot clean straight away with a warm damp cloth.
How do we store these so they last?
Keep flat pieces in a folder or a plastic sleeve, out of direct sunlight, which fades paint faster than anything else. Add the year to every piece so the pile still makes sense in a decade.
For salt dough ornaments, wrap each one in tissue and pack them somewhere they will not be crushed. Sealing them with varnish before storage is what stops them crumbling over time.
What can we add if we do not have craft supplies?
A marker and whatever is in the kitchen drawer will get you there. Cotton swabs make perfect ornament dots, and the end of a pencil eraser works just as well.
Torn scraps of colored paper glued on look like ornaments, and a folded strip of paper makes a star. The tree does the heavy lifting, so the decorations really can be anything.
Start Your Christmas Tree Footprint Craft This Weekend
Pick one idea from this list, put an old towel on the floor, and get the green paint out before December gets away from you. A Christmas tree footprint craft takes about twenty minutes from setup to cleanup, and you will be glad every year that you made the time.
Start with the classic version to get your eye in, then move on to cards or ornaments once you know how your child’s foot prints. Write the name and the year on every single one, and put them somewhere you will find them again next December.
6 Reindeer Footprint Craft Ideas Kids Will Beg to Make Again
Baby Footprint Christmas Crafts That Make the Sweetest Keepsakes


Leave a Reply