Last updated: October 12, 2026
Flower handprint crafts turn a small hand into a sunflower, a tulip, or a whole bouquet in just a few minutes. Below you will find the best ideas to try first, the supplies that make them easy, and the safety tips that keep painting time stress free.
Whether you have a toddler who loves to squish paint or a bigger kid who wants a keepsake for grandma, there is a flower here for you.
Sunflower Handprint Craft
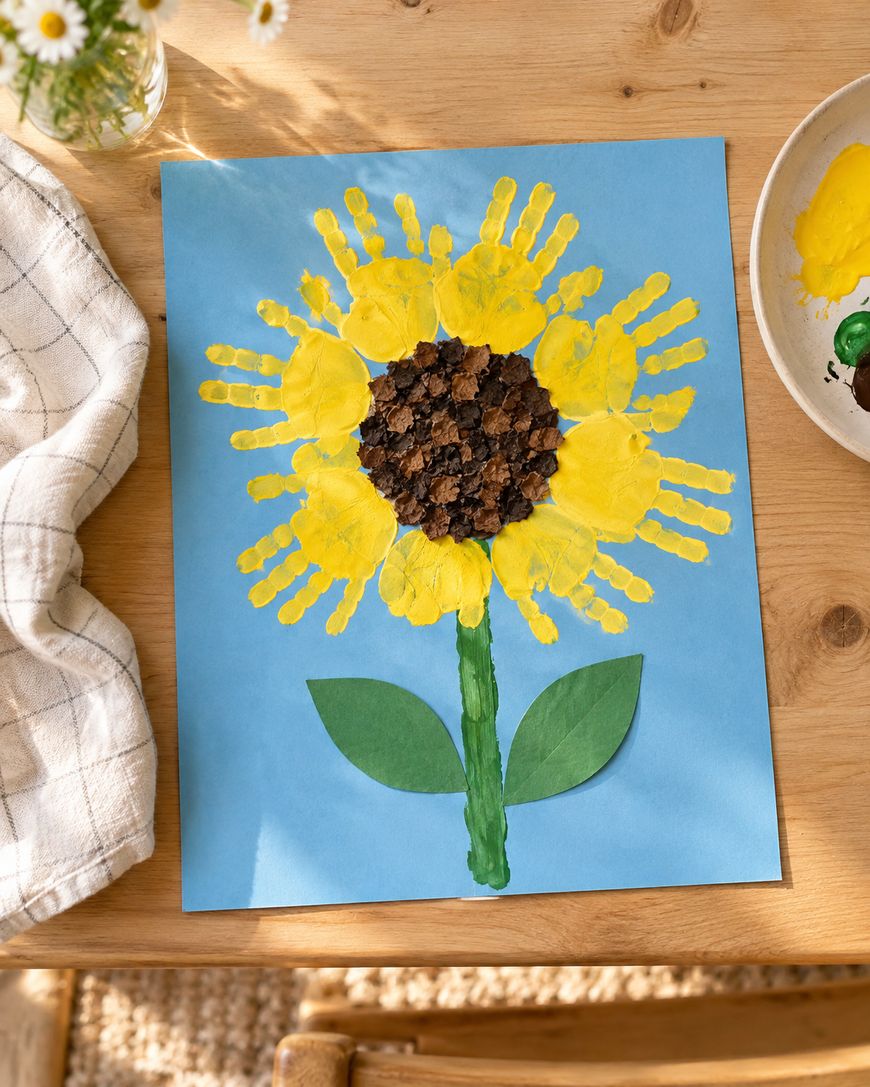
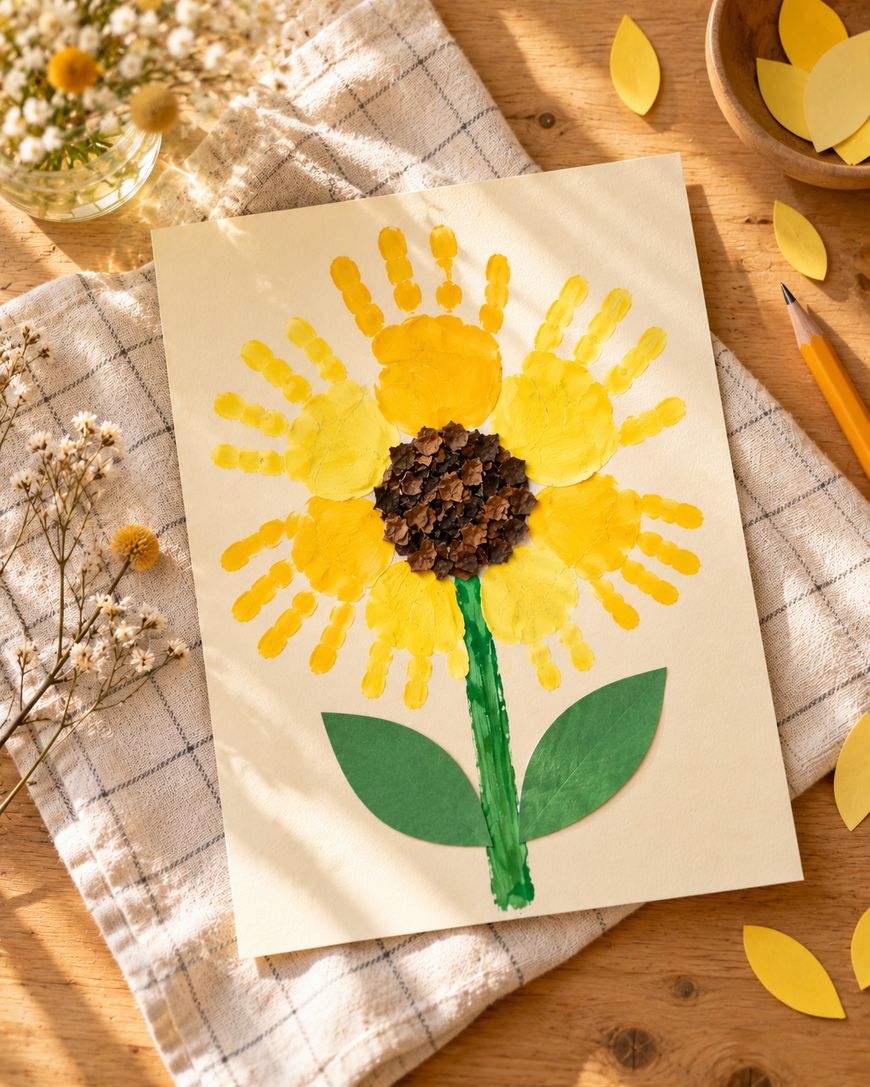
The sunflower is the easiest place to start because the handprint does all the work. Each finger becomes a petal, so one hand pressed in a circle makes a full bloom.
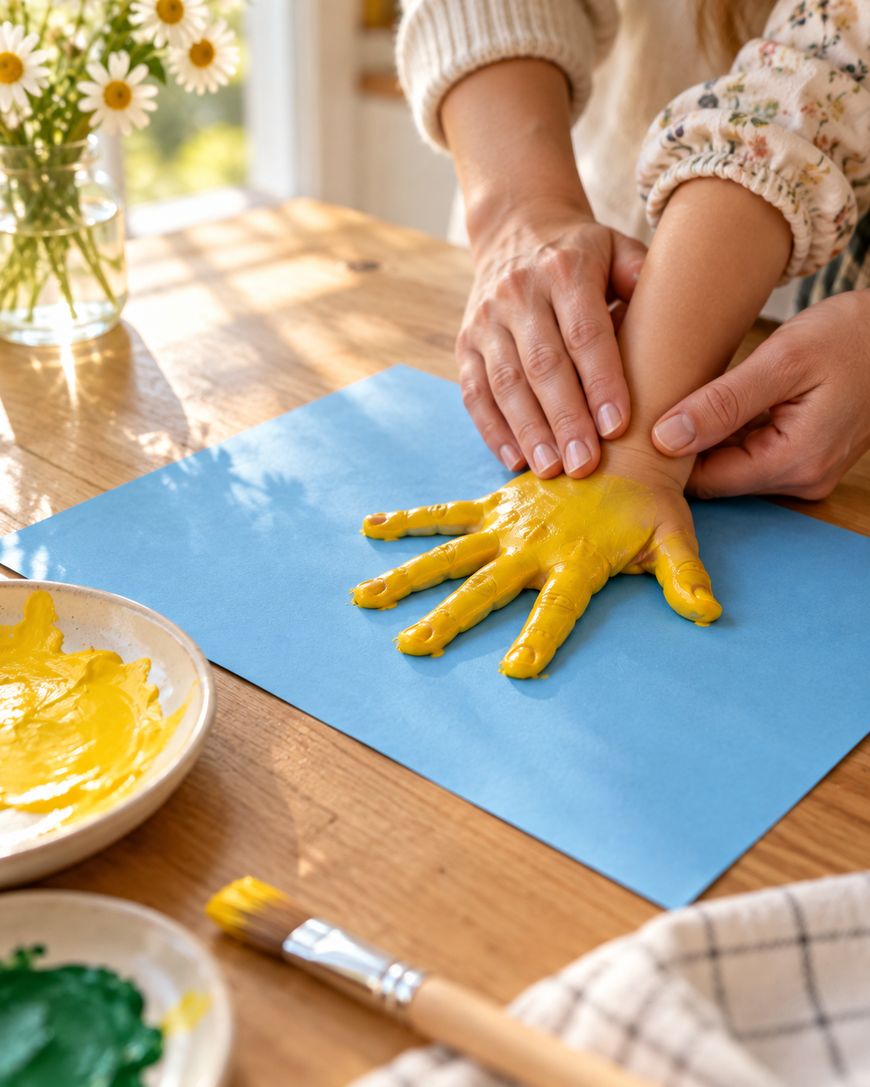
Paint a thin, even layer of yellow on the palm and fingers with a soft brush. Press the hand onto the paper, lift straight up, and repeat in a ring so the fingers point outward and the palms overlap in the middle.
Once the yellow petals are dry, add a round brown center with a sponge or a fingertip. Dab a little darker brown around the edge of the center for a seed head that looks more realistic.
Choose a bright sheet of blue or green paper so the yellow stands out. A sunflower handprint craft also looks great repeated three or four times across a long strip of paper.
Finish with a green stem painted with a brush and two leaf shapes cut from green paper. You can also glue on a few real sunflower seeds if you want texture, as long as you keep them away from little mouths.
Tulip Handprint Bouquet
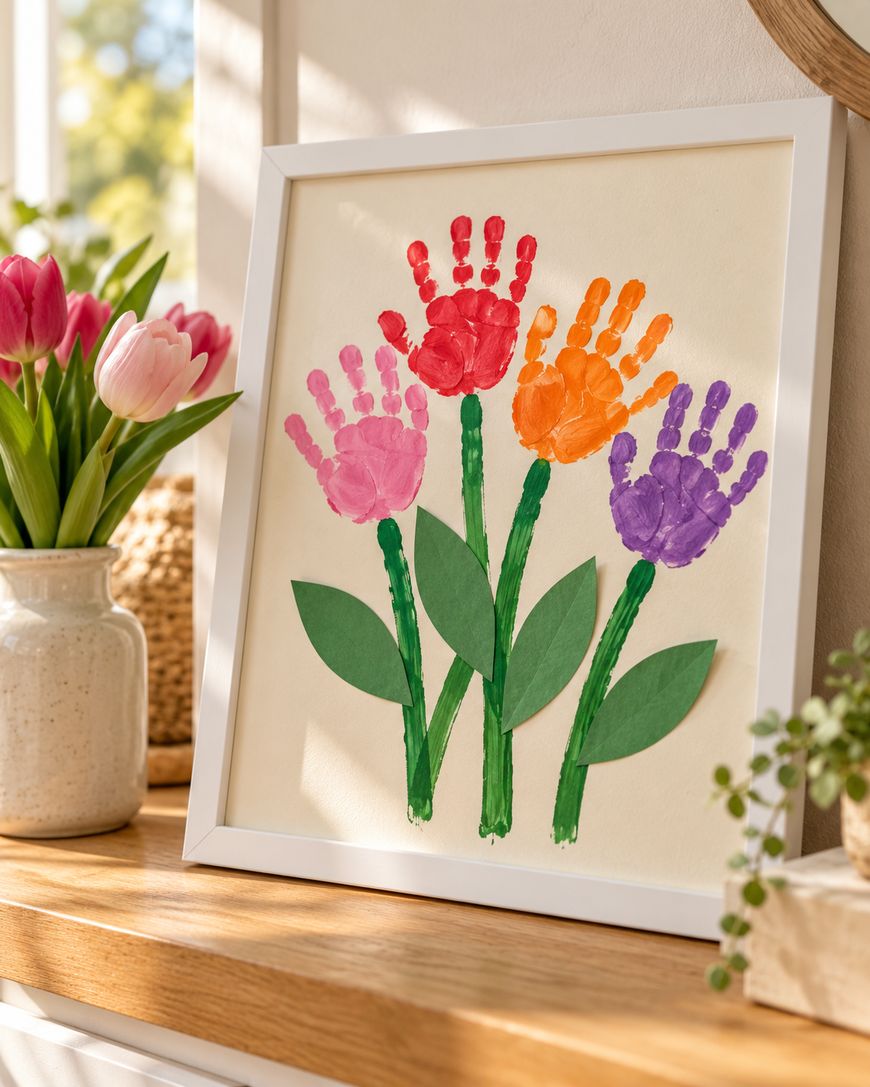
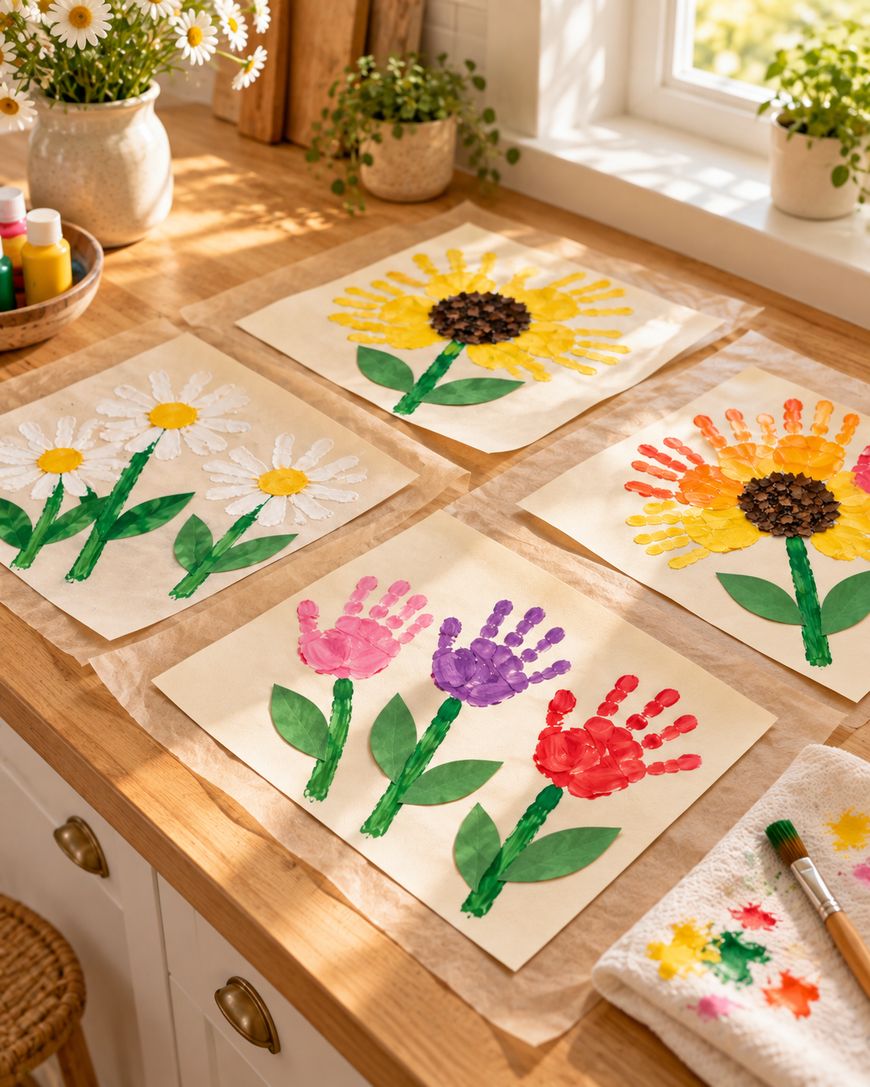
A tulip handprint craft uses the whole hand as the flower head, which makes it perfect for a bouquet you can frame. Press one hand with the fingers closed together and pointing up, and the shape looks like a tulip bud right away.
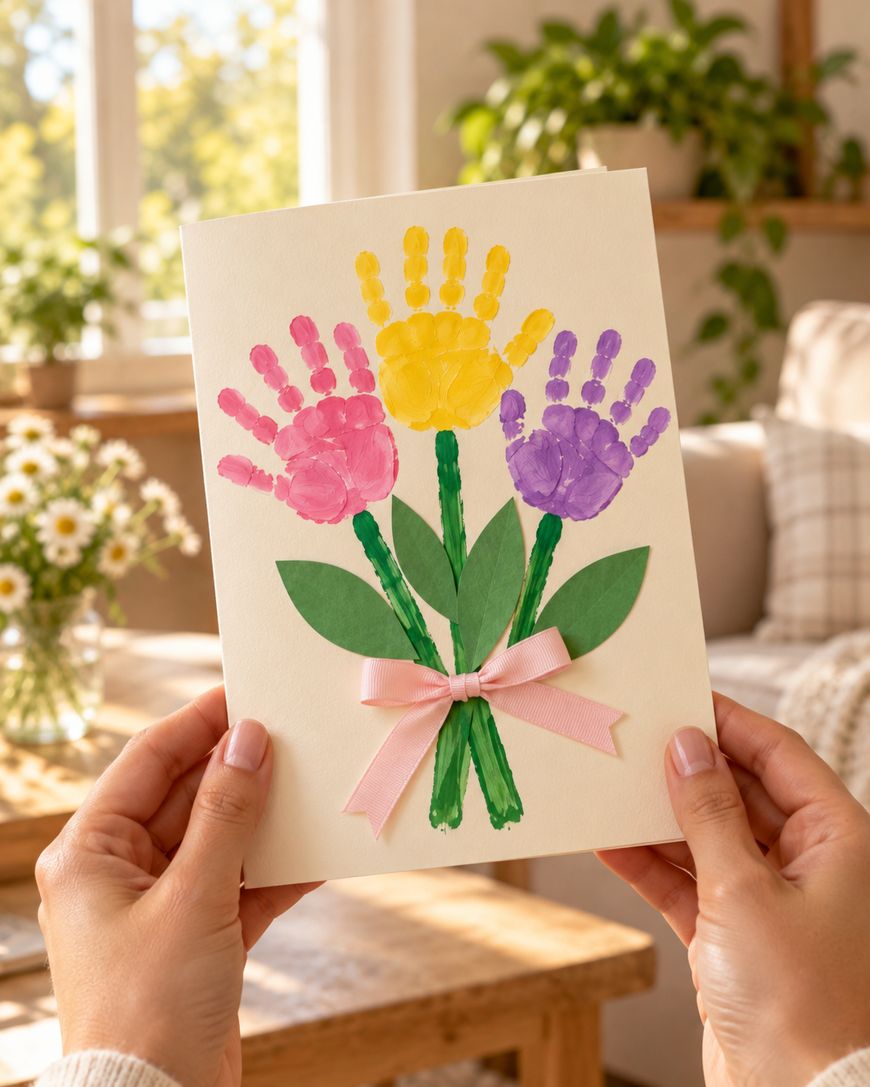
Make each tulip a different color for a cheerful spring look. Pink, red, orange, and purple all look lovely next to each other on a cream or pale blue background.
After the paint dries, draw long green stems from the base of each hand using a marker or a thin brush. Add a pair of paper leaves to every stem so the bouquet feels full and balanced.
For a gift, tie a real ribbon around the stems and glue it in place. Write the child’s name and the date on the back so the keepsake is easy to date years from now.
If you want a layered look, press a smaller second hand in a lighter shade over the first. The overlap looks like the inner petals of a real tulip.
Paper Handprint Flowers Without Paint on Skin
Not every child is ready for paint on their hands, and that is perfectly fine. Paper handprint flowers give you the same sweet shape with a lot less mess.
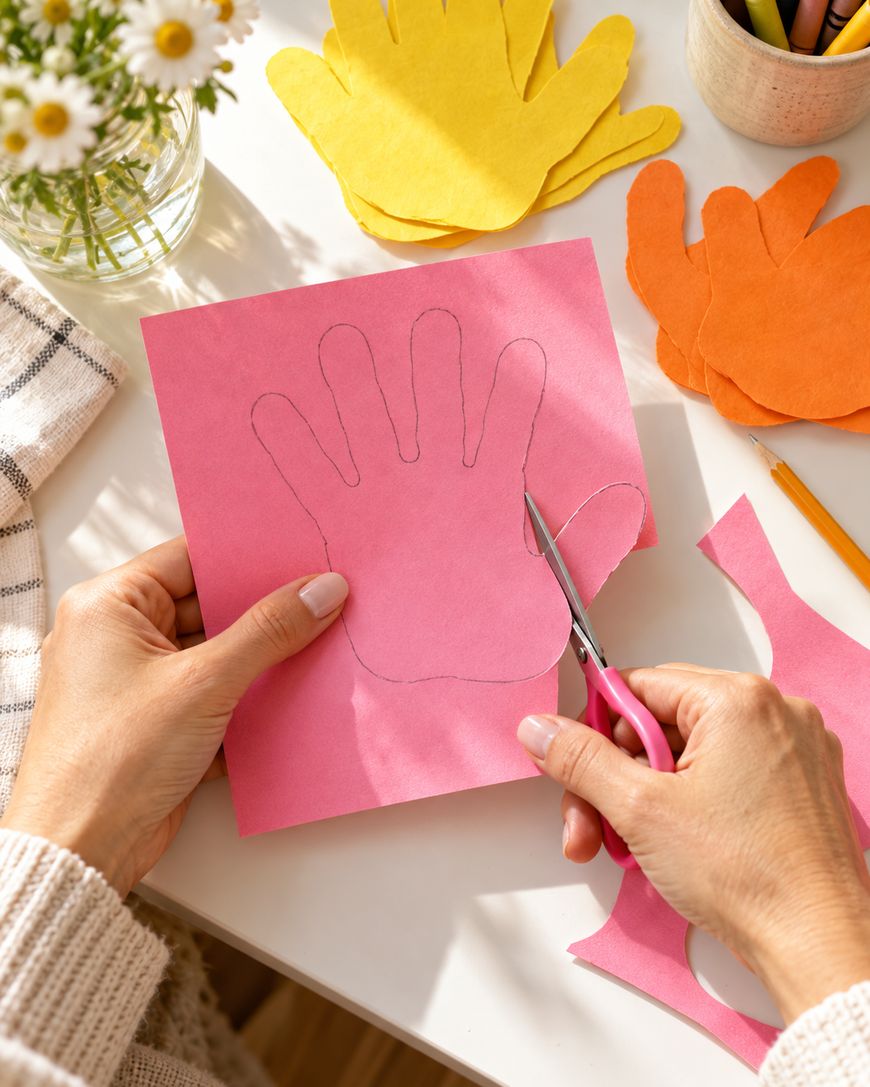
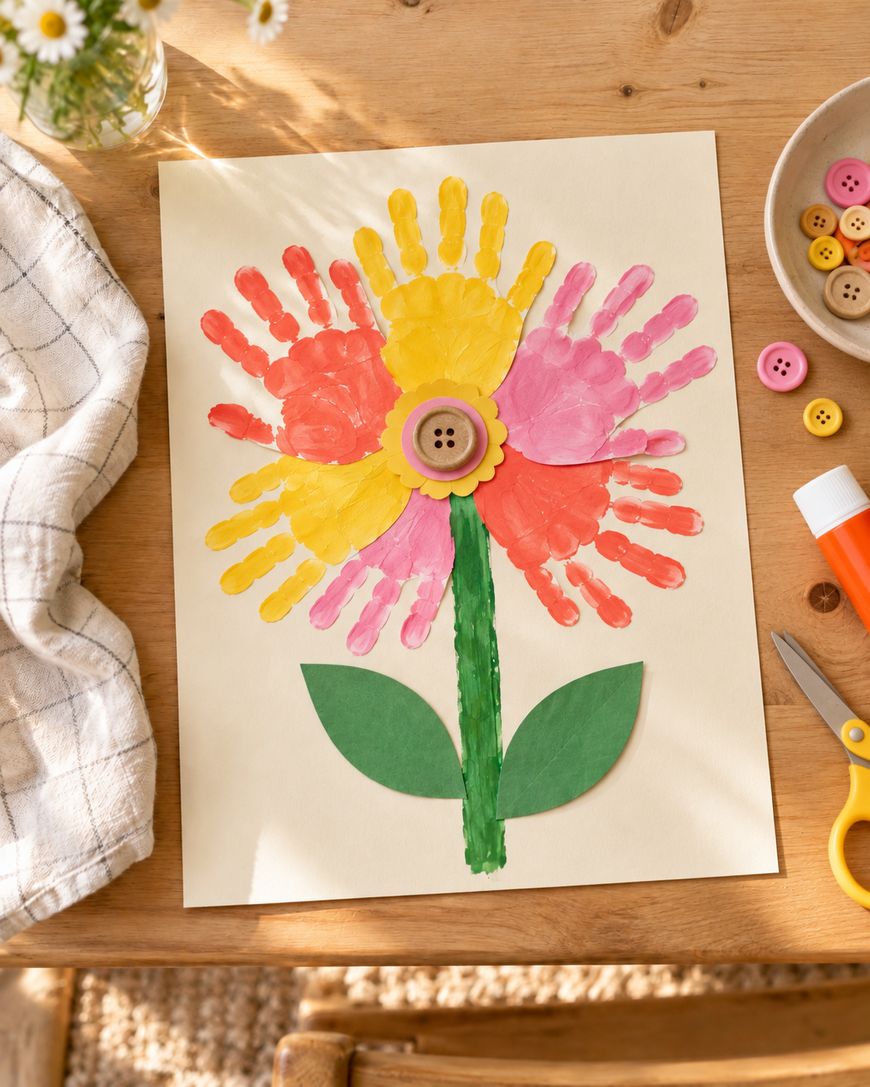
Trace the hand onto colored paper with a pencil, then cut out the shape. Cut several outlines in different colors and layer them in a circle, gluing the palms together so the fingers fan out like petals.
Use a button or a pom pom for the center to give the flower some dimension. Glue the whole flower to a green paper stem and stick it on a card or a sheet of construction paper.
This version is also a good choice for babies and for children who put their hands in their mouths. If you want a printed look on a baby, look for an ink-free baby print kit and follow the directions on the package.
Daisy Handprint Craft
Daisies are a gentle, sweet option that works well on a bright background. Use white paint for the petals and yellow for the center, and press the hand in a circle just as you would for a sunflower.
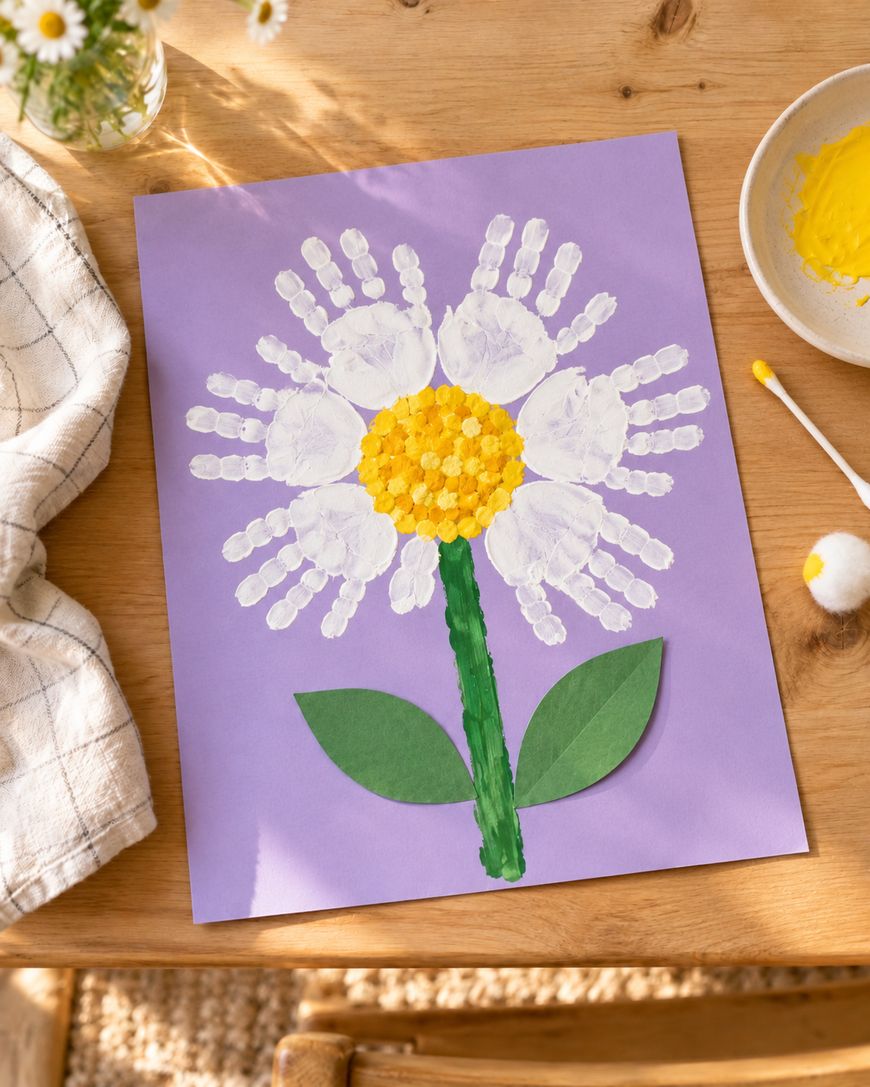
White paint can look thin on dark paper, so choose a mid-tone like sky blue, green, or lavender. If the first print looks pale, wait for it to dry and press a second layer on top.
To make the center, dip a cotton ball or a round sponge in yellow paint and press it right in the middle. Add tiny dots with a cotton swab around the edge for a pollen look.
Cut a few grass blades from green paper and glue them along the bottom. A daisy handprint craft like this looks wonderful on a classroom wall or lined up along a hallway.
Try mixing in a few pink or lilac daisies for variety. A single color of petal repeated in a row also looks neat and modern when framed.
Handprint Flower Garden Keepsake
Once you have the basic flowers down, you can combine them into a full garden. This is a great project for several children working together, because every handprint adds a different bloom.
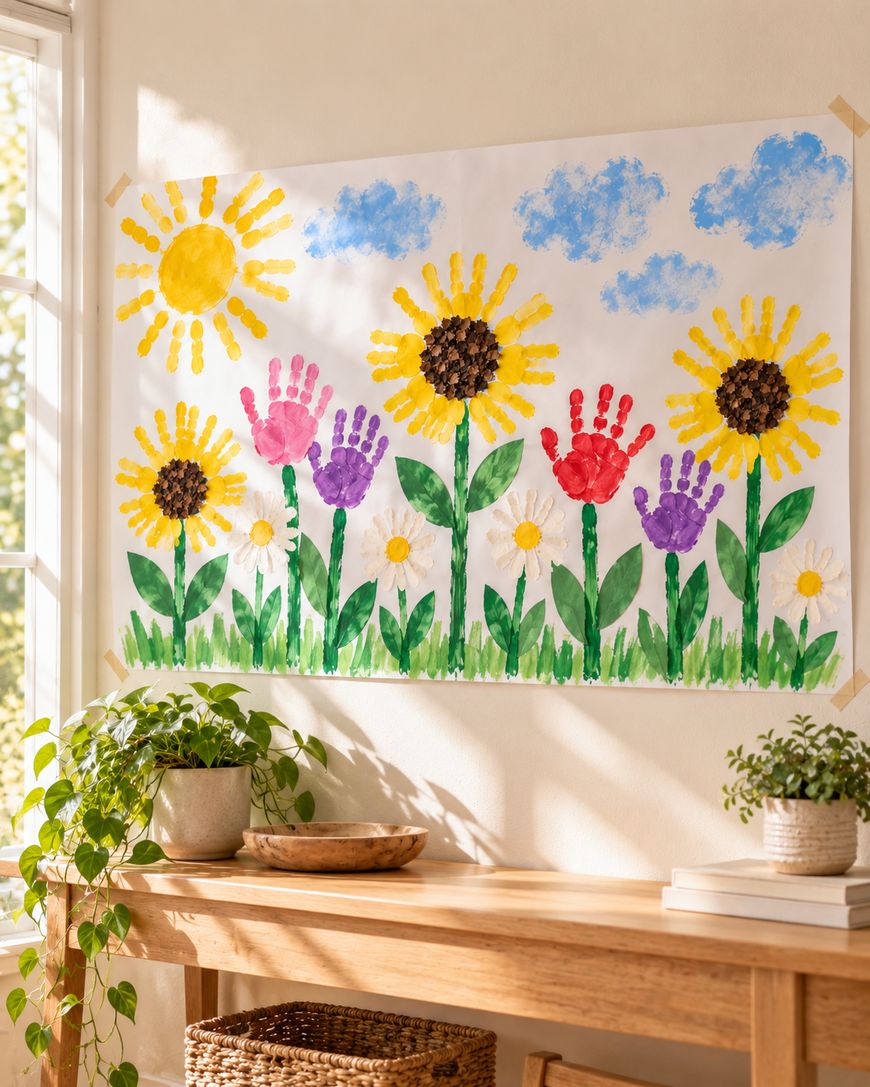
Lay a large sheet of paper on a table and sketch a ground line with a green crayon. Let each child make their own flower, then connect them with stems of different heights so the garden has depth.
Paint a bright sun in a corner and add clouds with a sponge for a finished scene. Include the date and each child’s name below their own flower so the piece becomes a real family keepsake.
If you are working with a group, give each child a separate paper plate for their paint. This keeps the colors clean and prevents arguments over who gets the yellow.
Let the garden dry flat overnight before you hang it. A strip of painter’s tape on the back makes it easy to display without damaging the wall.
Supplies and Safe Paint Tips for Flower Handprint Crafts
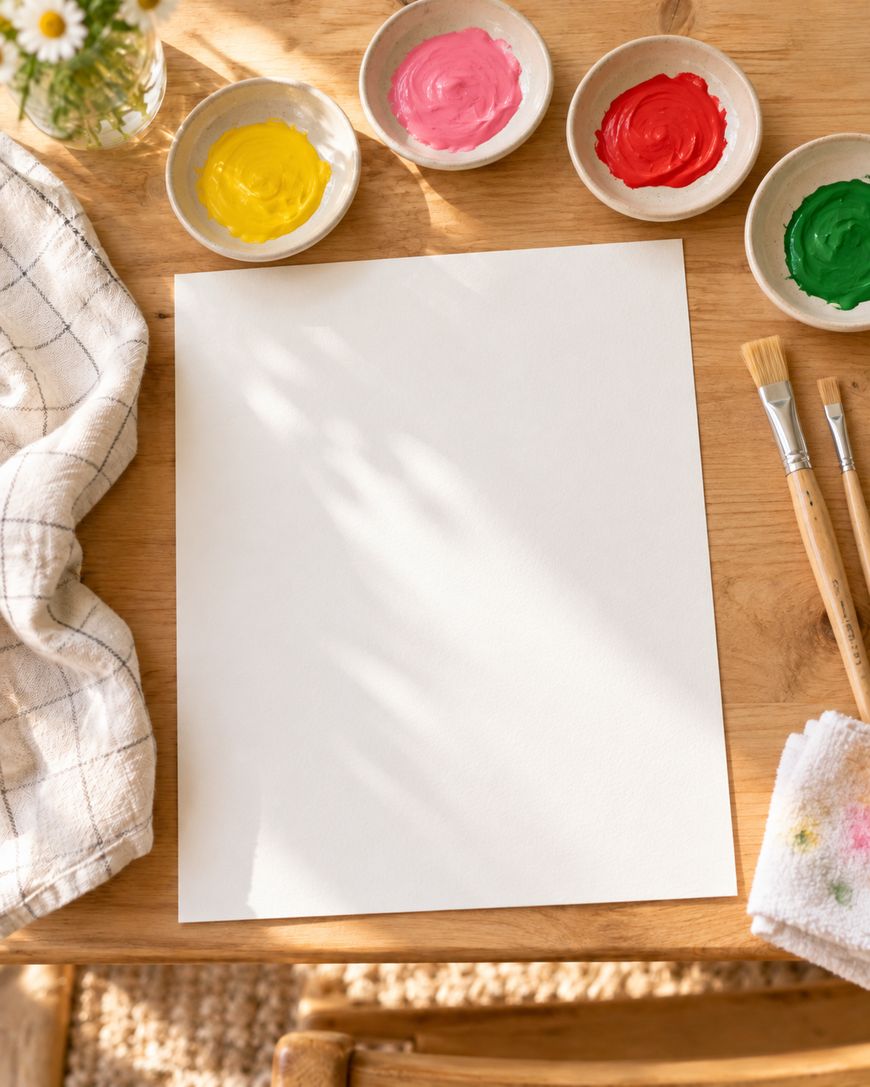
You do not need much to get started. Heavy paper or cardstock, a soft brush, a few washable paints, a damp cloth, and a towel will cover nearly every idea above.
The most important choice is the paint, because it will be on skin. Look for a paint labeled for use on hands and skin, and read the maker’s directions before you begin.
A general non-toxic label on its own does not always mean a product is meant for skin, so check the wording on the package.
The Art and Creative Materials Institute runs a certification program for art materials, and its seal on a package is one thing you can look for. Treat it as a starting point and still follow the label on the specific product you buy.
Before painting a whole hand, test a small dab of paint on the inside of the wrist to see how the skin reacts. If your child has sensitive skin or a skin condition, check with your pediatrician before using any paint on their hands.
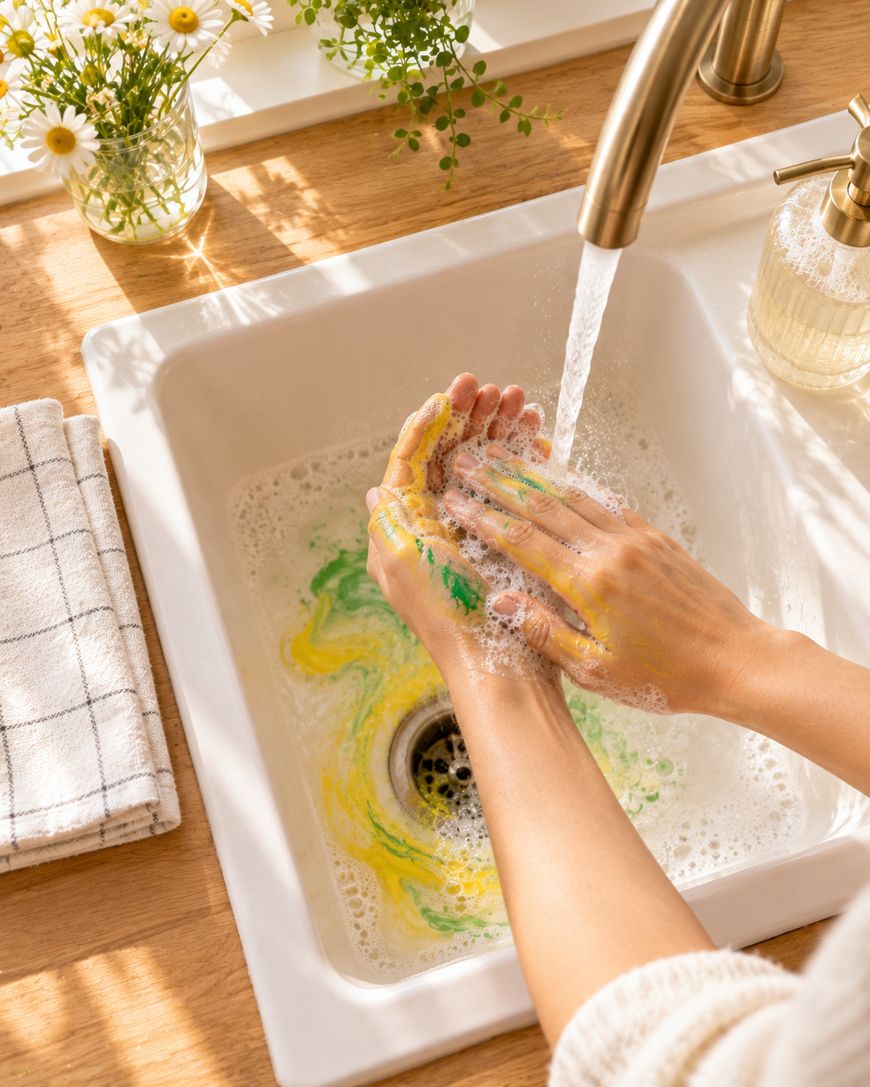
Stay close the entire time, keep paint away from faces, and wash hands with soap and water as soon as the print is done. If you notice any redness or irritation, stop and wash it off.
Tips for a Clean, Crisp Handprint
Use a brush to apply a thin layer of paint rather than dipping the whole hand in a tray. Thick paint pools between the fingers and turns into a blob on the page.
Bring the paper up to the hand instead of pushing the hand down onto a table. Press from the palm out to the fingertips, then lift straight up to avoid smearing.
Keep a damp cloth within reach so you can wipe a hand clean right after each print. Lay a towel under your work area to catch drips.
Practice once on scrap paper before you make the real print. That first test teaches you how much paint is enough and how hard to press.
Let each print dry flat until it is dry to the touch before adding details. Marker lines and glued paper stems go on much better once the paint has fully set.
Why Flower Handprint Crafts Make Great Keepsakes
A handprint captures the exact size of a hand at one moment in time. When you look back at it later, you remember how small those fingers were.
Flower handprint crafts also make wonderful gifts. Grandparents, teachers, and mothers tend to treasure a framed bouquet far more than anything store bought.
They are inexpensive, too. Craft supplies you already own often cover most of the project.
A few sheets of paper and a small set of paints can produce a whole gallery of art for the cost of a single card.
Finally, these projects build skills through play. Pressing, painting, and gluing all give little hands practice with control and coordination while the child feels proud of what they made.
They also give you a reason to slow down together. Sitting at the table with paint and paper is a quiet way to spend an afternoon as a family.
Flower Handprint Crafts FAQ
What paper works best for flower handprint crafts?
Heavy cardstock or thick watercolor paper holds up best because it does not curl or tear when it gets wet. Thin printer paper works too, but let it dry flat under a book.
Can you make flower handprint crafts with a baby?
Yes, but choose a method made for babies. Paper cutouts or an ink-free baby print kit are gentler options than paint, and you should always follow the directions on the package.
How do you get paint off little hands?
Wash with warm water and soap right after the print is finished. Wiping with a damp cloth between prints keeps the paint from drying on the skin.
How can you make the flowers last?
Let the paint dry fully, then place the finished piece in a frame behind glass. Keep it out of direct sunlight so the colors stay bright.
What can we use if your child does not like the feel of paint?
Try a sponge or a soft brush so the paint never needs to touch the whole hand. Paper handprint flowers are another easy choice that skips paint entirely.
Start Your Flower Handprint Crafts Today
Flower handprint crafts are simple, affordable, and full of heart. Pick one idea, gather your paper and washable paints, and set aside an afternoon.
Start with the sunflower and work your way through the bouquet and the garden. Before you know it you will have a keepsake collection worth framing.
Once you finish your first flower, tell us which one your family loved most. Then hang it somewhere you will see it every day.
Try more baby footprint art ideas
Browse more kids art project ideas

Leave a Reply