Last updated: October 12, 2026
Halloween construction paper crafts are the easiest way to fill a fall afternoon with spooky fun. Below you will find simple projects you can start right away with supplies you probably already own.
Grab a stack of black, orange, white, and purple paper, and we will get crafting.
Paper Bat Garland
A paper bat garland is the perfect first project because it looks dramatic and takes very little skill. Fold a sheet of black paper in half, draw half of a bat shape along the fold, and cut it out so you get two matching wings.
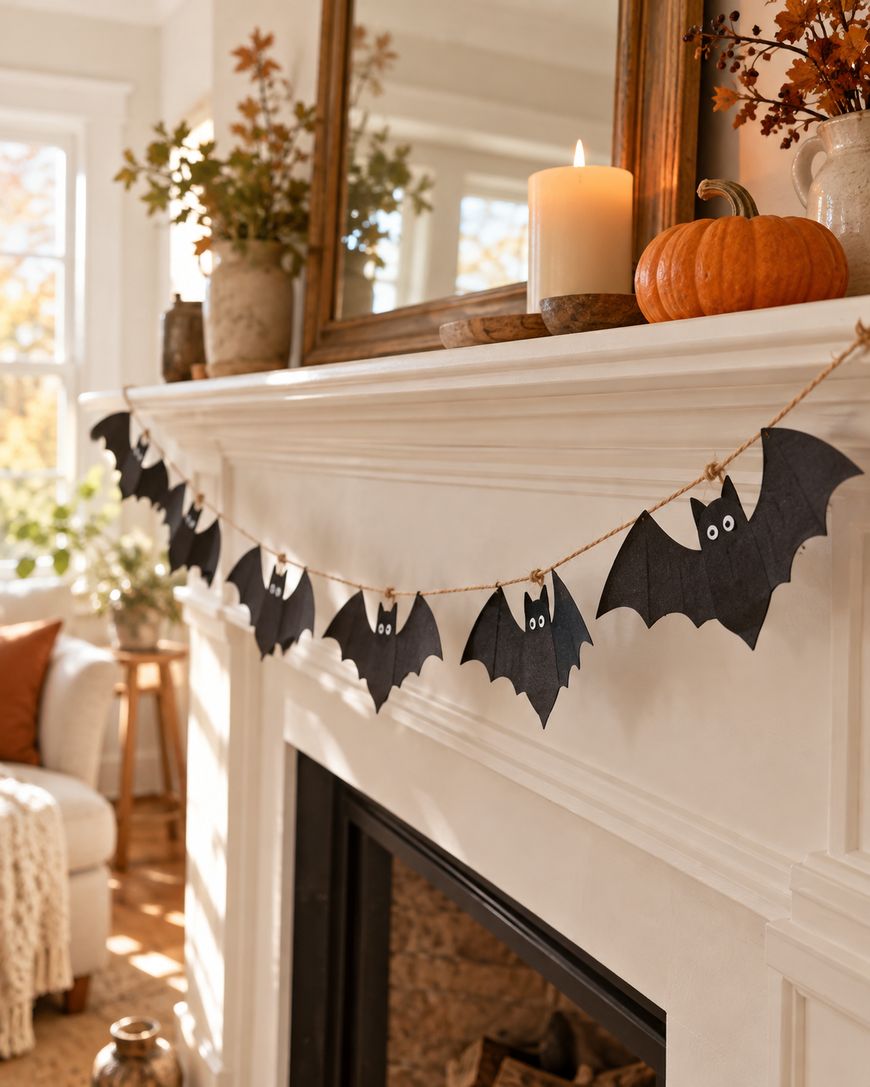
Once you have a few bats, tape or glue them to a length of yarn or string. Hang the garland across a mantel, a window frame, or the edge of a bookshelf for an instant Halloween look.
Vary the sizes so the garland feels like a real flock. Small bats can sit between big ones, and you can tilt the wings up or down for movement.
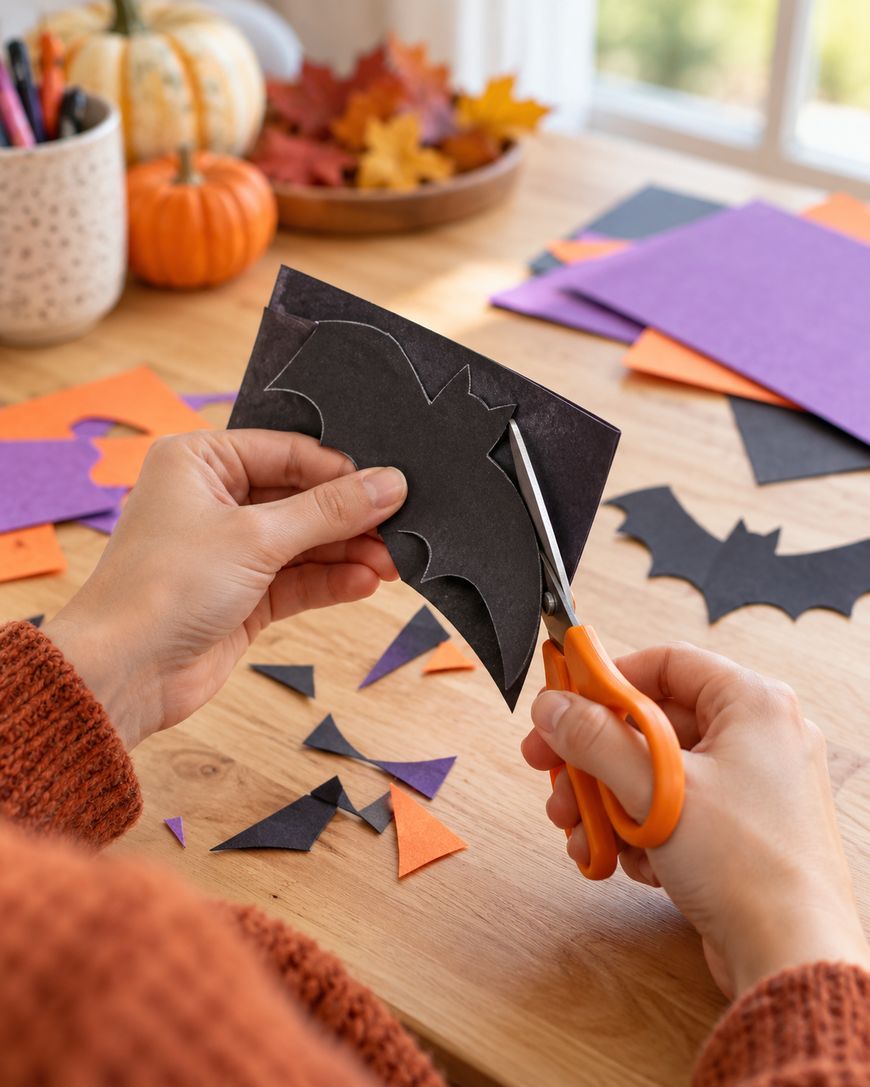
For extra personality, add two tiny white paper circles for eyes and a pair of triangle ears. You can also curl the wing tips around a pencil so the bats lift off the wall and cast soft shadows.
Kids love this one because they can make a whole swarm in a short time. It is also a great way to use up scraps from other projects.
Layered Paper Pumpkin Collage
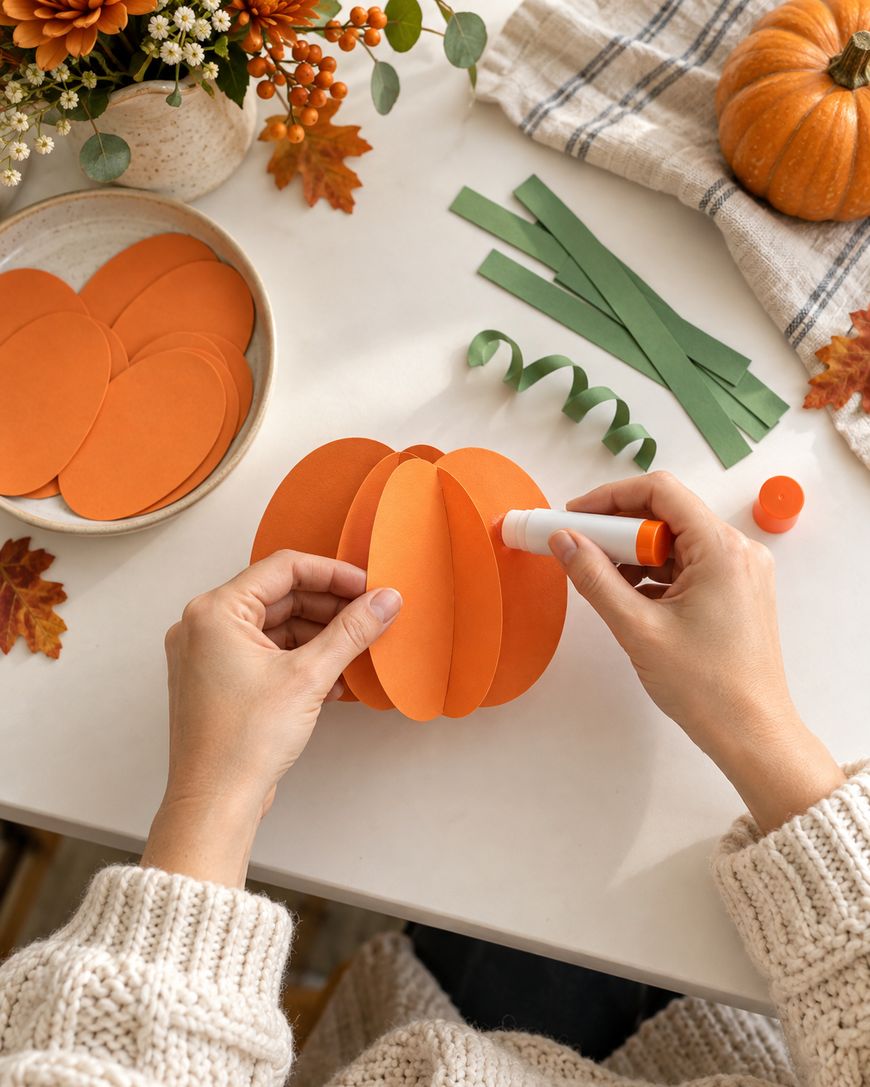
A layered pumpkin collage turns flat paper into a cozy fall decoration. Cut several orange ovals in slightly different sizes, then glue them side by side so they overlap like the ribs of a real pumpkin.
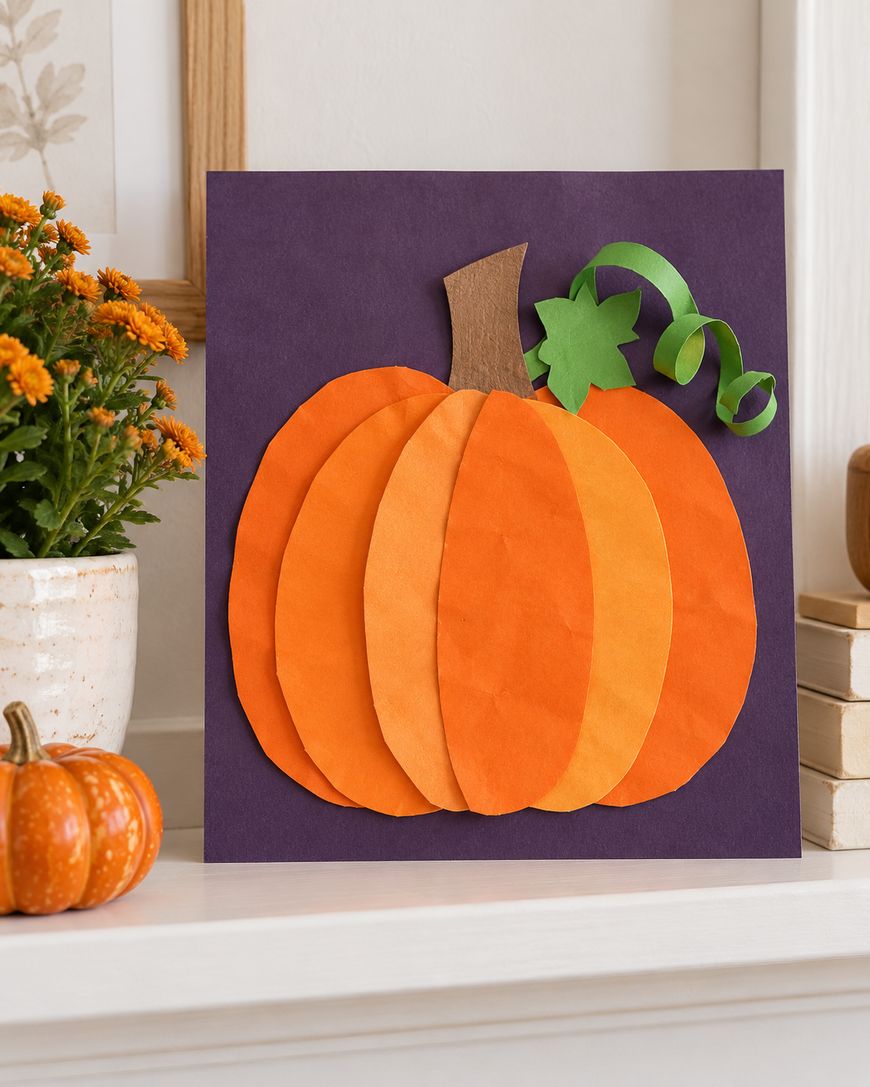
Add a small brown rectangle at the top for the stem and a curly green strip for a vine. Wrap the green strip around a pencil to make it spiral.
Once the pumpkin body is built, glue it onto a sheet of black or dark purple paper. The contrast makes the orange glow.
You can give your pumpkin a face with black triangles for eyes and a zigzag mouth. Or leave it plain and let the layers be the star.
Try making a whole pumpkin patch in different sizes and hanging them in a row. Tall skinny pumpkins and short round ones make the display feel playful and full.
Woven Paper Spider Web
A woven spider web is a calm, satisfying craft that also builds patience. Start with a square of black paper and cut parallel slits from the bottom edge up, stopping before you reach the top.
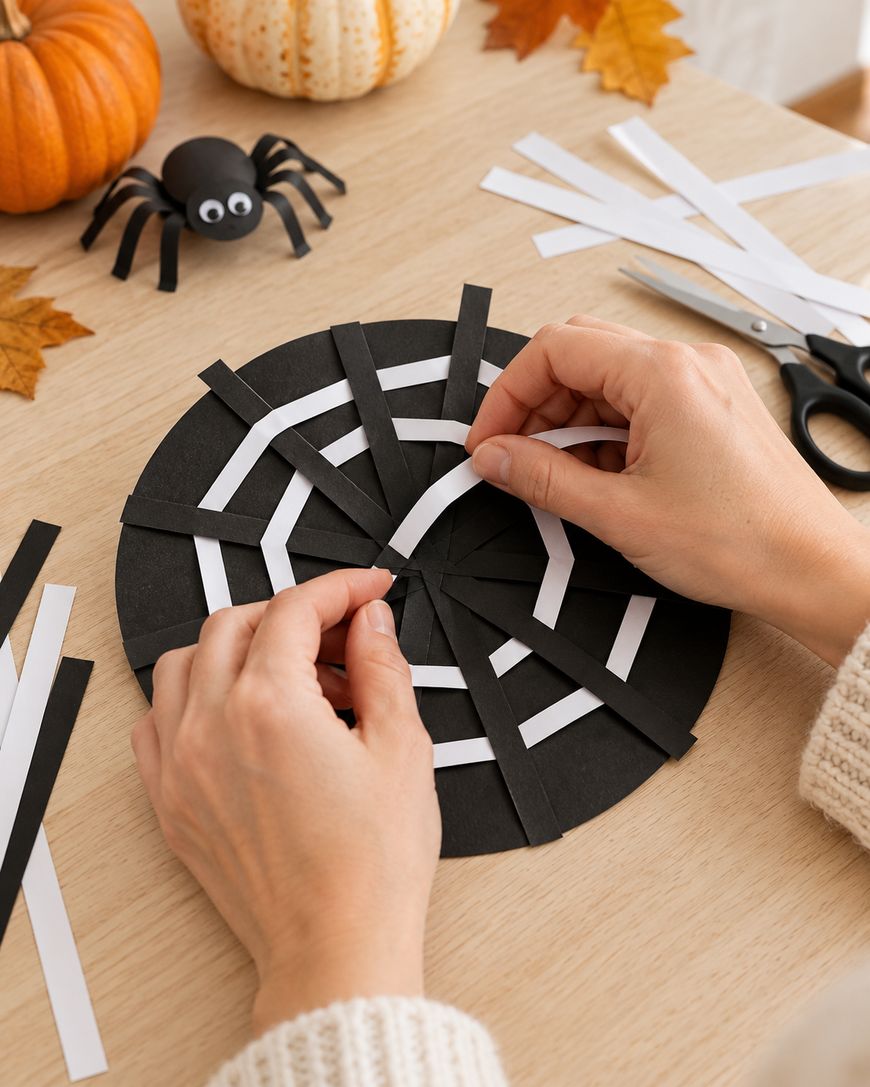
Then cut thin strips of white or gray paper and weave them over and under the black strips. Slide each new strip snug against the last one and glue the ends in place.
When the weaving is finished, trim any extra paper around the edges. Mount the web on a bright orange background so the pattern stands out.
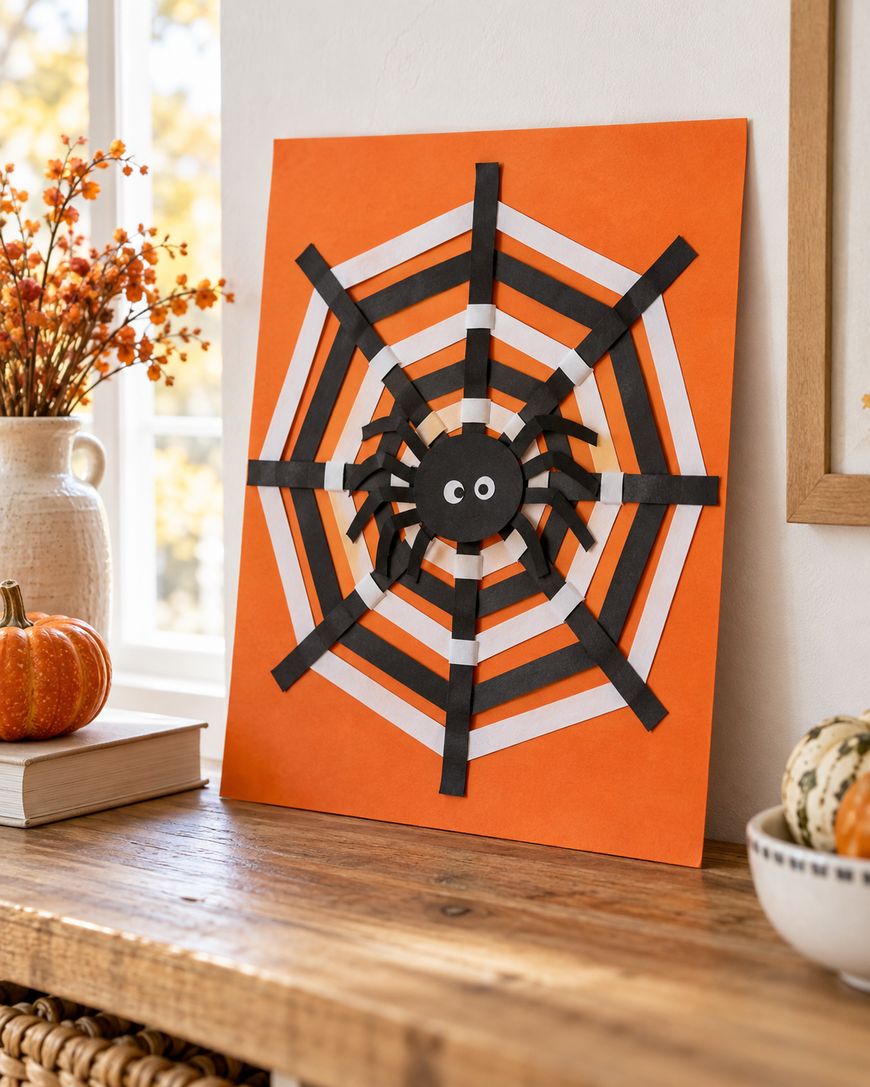
Finish with a small spider made from a black paper circle and eight thin legs. Glue it right in the center or let it dangle from a short piece of string.
If you want a more graphic look, swap the white strips for silver or purple paper. The web will look fresh in a whole new color story.
Accordion Arm Paper Ghosts
These friendly ghosts get their charm from wiggly accordion arms. Cut a tall ghost shape from white paper, with a rounded head and a slightly wavy bottom edge.
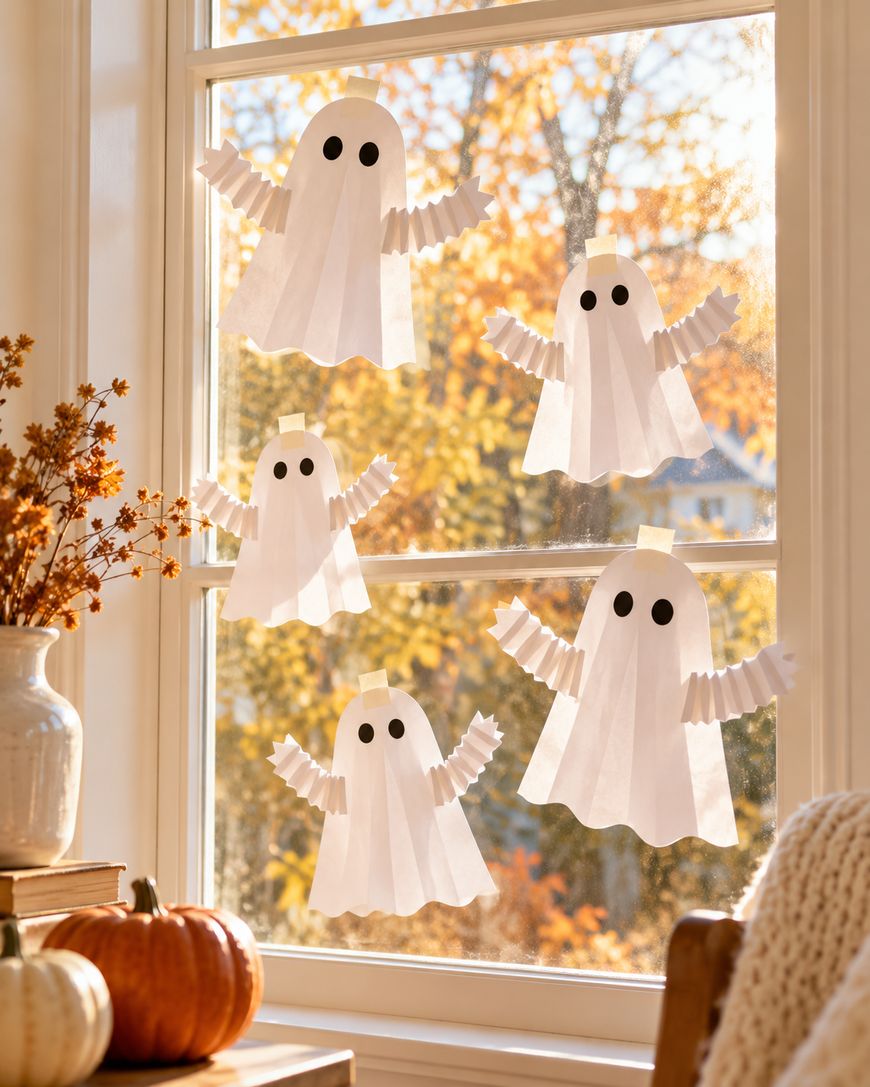
Next, fold two thin white strips back and forth to make springy arms. Glue them to the sides of the body so they bounce when the ghost moves.
Add two big black circles for eyes and a small oval for a surprised mouth. Little details like rosy cheeks cut from pink paper make the ghost feel sweet instead of scary.
Display the ghosts on a window, a door, or a long wall. They look especially cute when you stagger them at different heights so they seem to float.
Because the arms stick out from the page, these ghosts have real dimension. Kids enjoy making them move, and they work well as party decorations too.
Construction Paper Frankenstein Faces
A paper Frankenstein is a fun way to practice shapes. Cut a big green rectangle for the head and a black strip for the flat hair across the top.
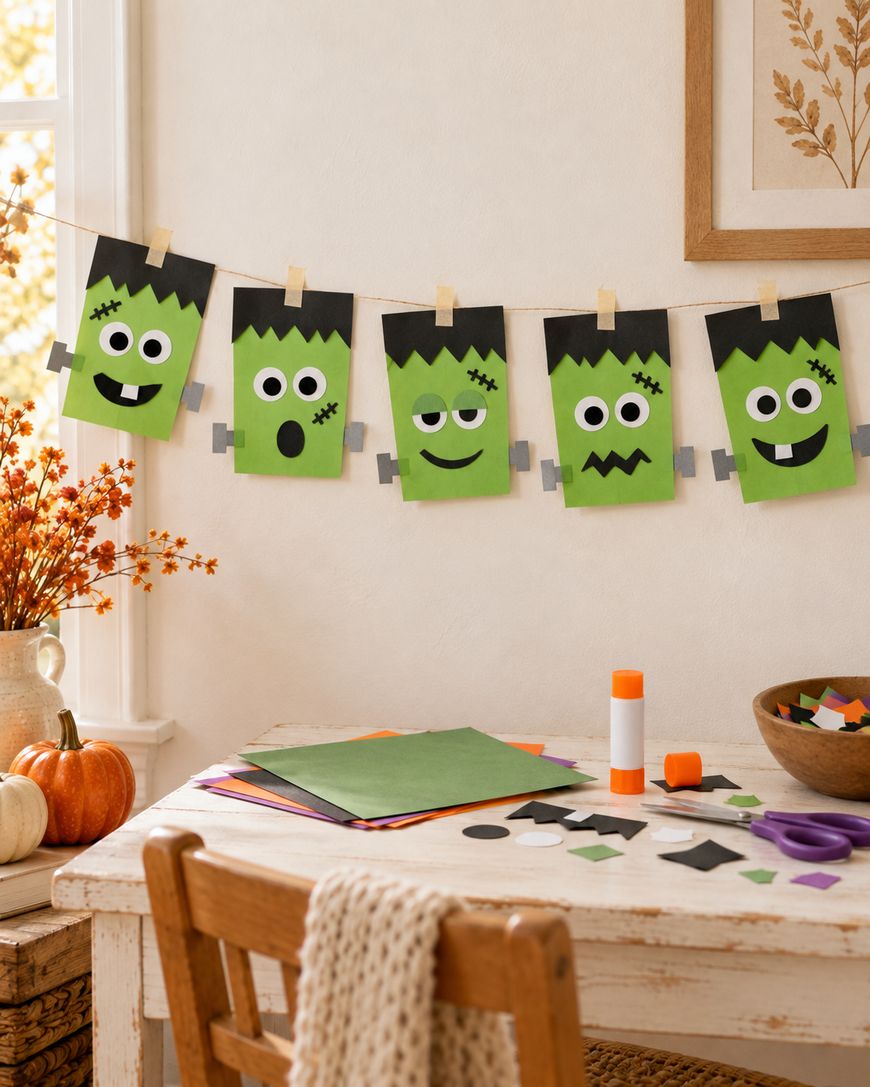
Glue on two white circles with smaller black circles inside for the eyes. Add a pink or red mouth and a pair of gray rectangles on each side for the neck bolts.
Stitches are the finishing touch. Draw a few short black lines across the forehead with a marker, or cut tiny strips of black paper and glue them on.
This craft is great for group play because every Frankenstein ends up with its own expression. Line them up on a wall and you have a whole monster gallery.
You can also try making a bride with tall swirled hair. A white streak cut from paper gives her that classic look.
Haunted House Silhouette Scene
A haunted house silhouette scene feels like a tiny storybook page. Begin with a gradient of orange, purple, and dark blue paper strips glued together to form a sunset sky.
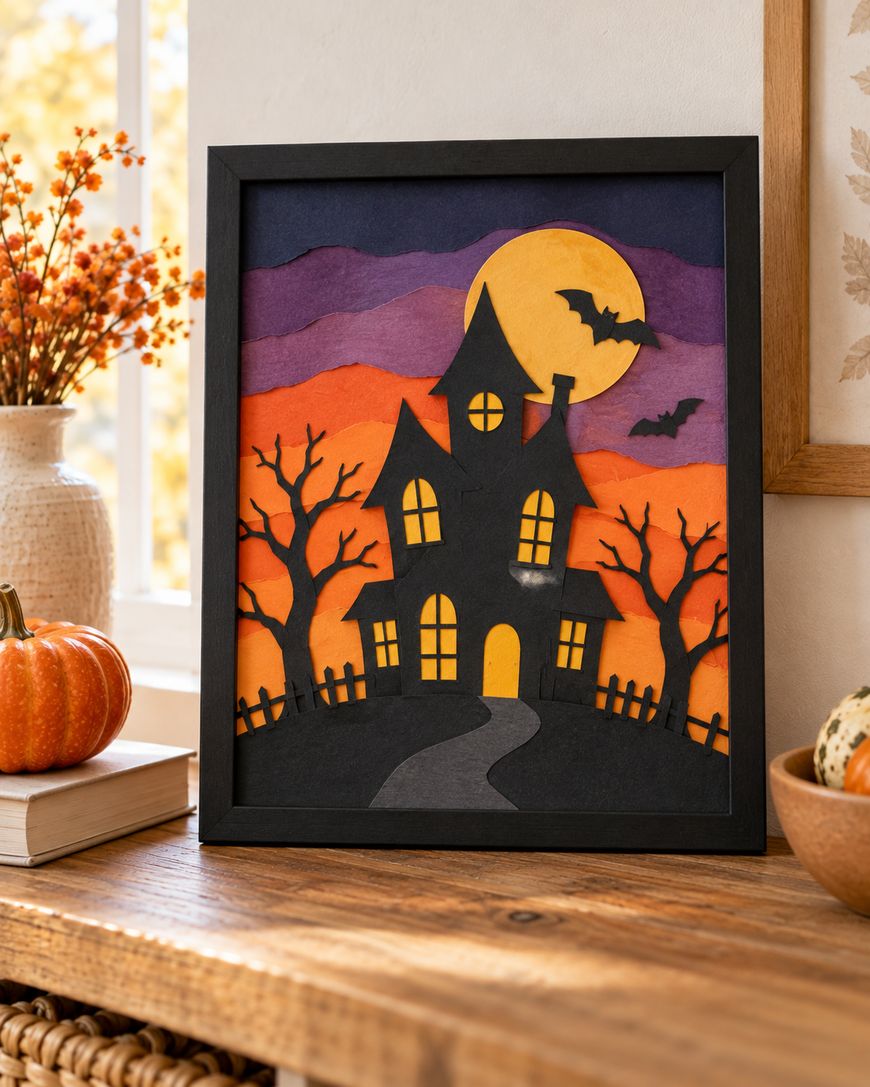
Cut a house shape from black paper with a pointed roof, a crooked chimney, and a few tall windows. Glue yellow squares behind the windows so they glow from inside.
Add bare trees, a round moon, and a few bats flying across the sky. Layering each piece slightly above the one beneath it adds depth.
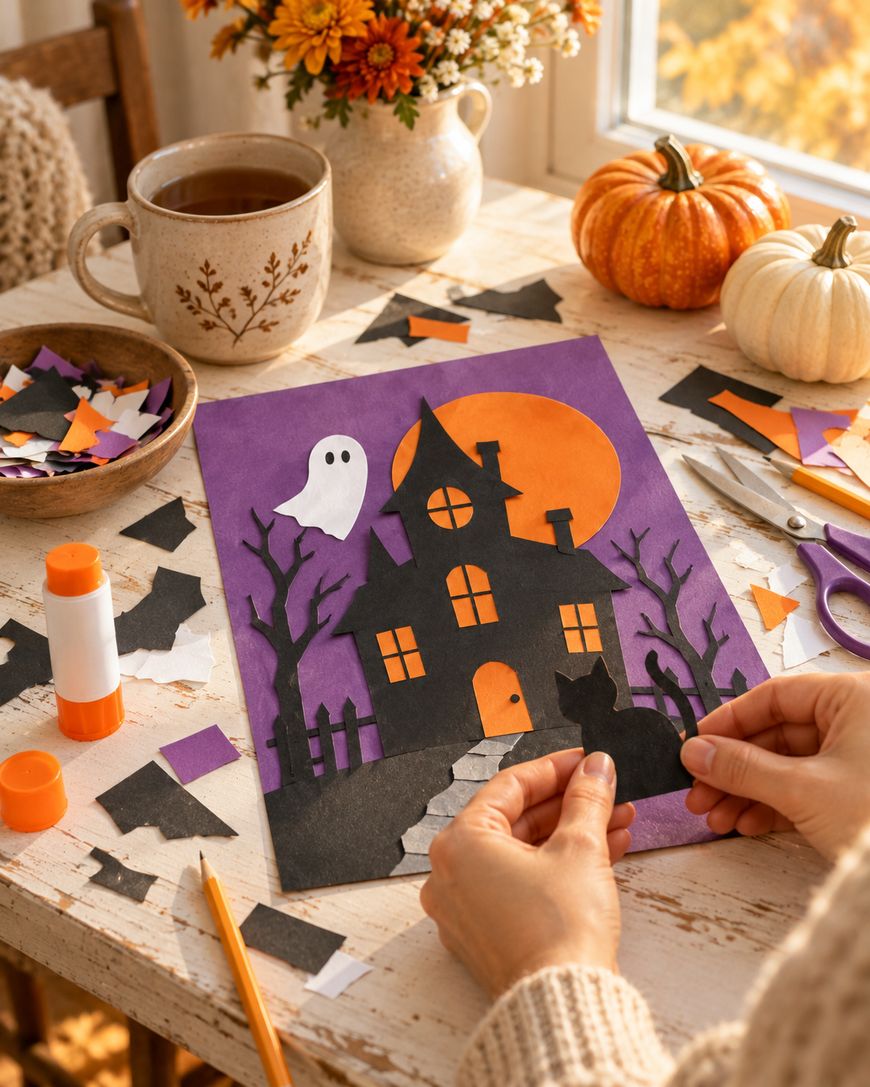
For a finishing touch, cut a tiny black cat for the roof peak. It gives the scene a story and a bit of humor.
Frame the finished scene with a black paper border or a simple picture frame. It makes a lovely keepsake you can pull out year after year.
Supplies for Halloween Construction Paper Crafts
You do not need a fancy craft room to get started, just a short list of basics. Construction paper in black, orange, white, green, purple, and yellow covers nearly every project here.
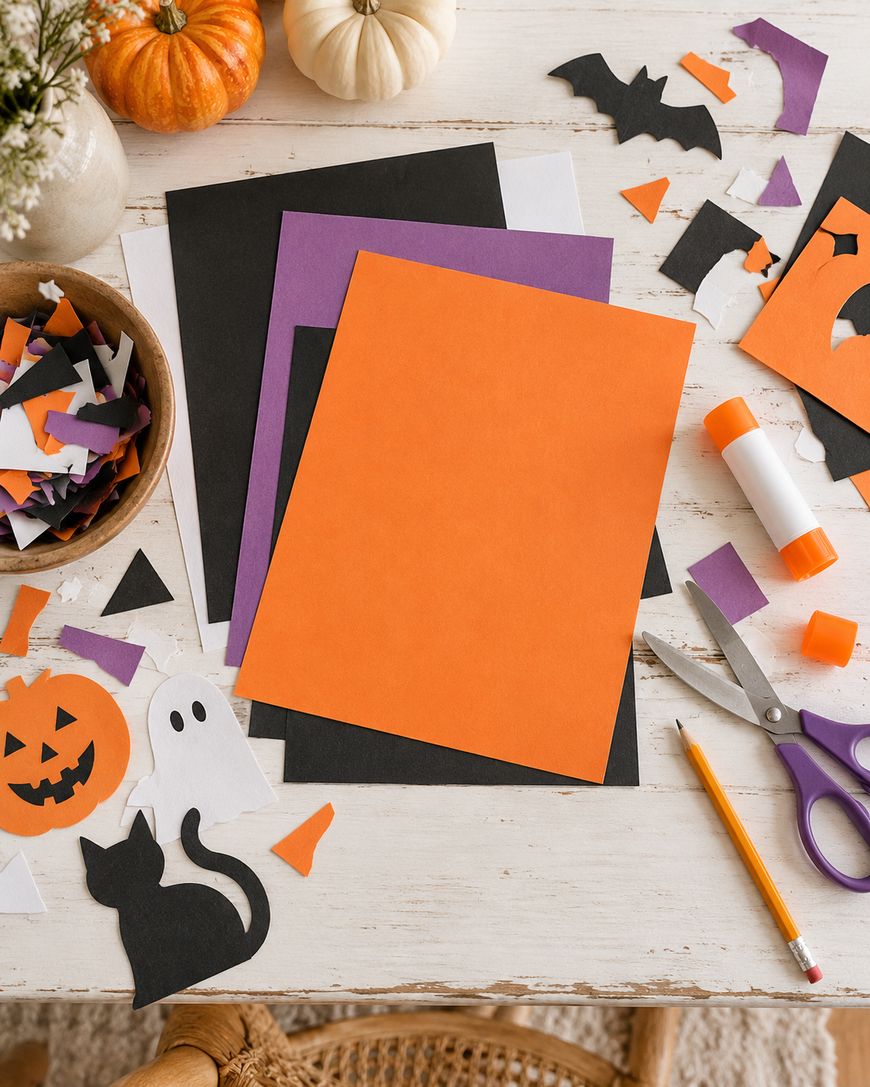
A pair of child-safe scissors, glue sticks, and a pencil will handle most of the work. Markers, googly eyes, and yarn are fun extras if you have them on hand.
Glue sticks are tidy and quick for small hands, while white craft glue holds thicker layers better. Keep a damp cloth nearby so sticky fingers can be wiped clean between steps.
If your paper is a little thin, glue the finished piece onto a sheet of cardstock. It will hold up much better on a wall or window.
A tray or old baking sheet also helps contain scraps and keeps small pieces from rolling away. Cleanup becomes as simple as tipping it into the trash.
Tips for Crafting Safely and Happily with Kids
Scissors are the main safety concern, so choose a pair designed for children and keep an adult close by. Show kids how to cut away from their fingers and put the scissors down when they are done.
Check the labels on your glue, markers, and paper to see whether they are marked non-toxic and suitable for children. Small items like googly eyes can be a choking hazard for little ones, so skip them or supervise closely around babies and toddlers.
Let kids make choices about colors and faces. A project that looks a little wobbly is usually more charming, and it keeps the experience relaxed.
Set up a clear workspace with a covered table and everything within reach. When the materials are ready, kids stay focused and the mess stays small.
Finally, plan a place to display the finished crafts. Kids feel proud when their work goes on the wall right away.
Why Halloween Construction Paper Crafts Work So Well
Construction paper is inexpensive, easy to find, and forgiving for beginners. You can cut it, fold it, tear it, and layer it without any special tools.
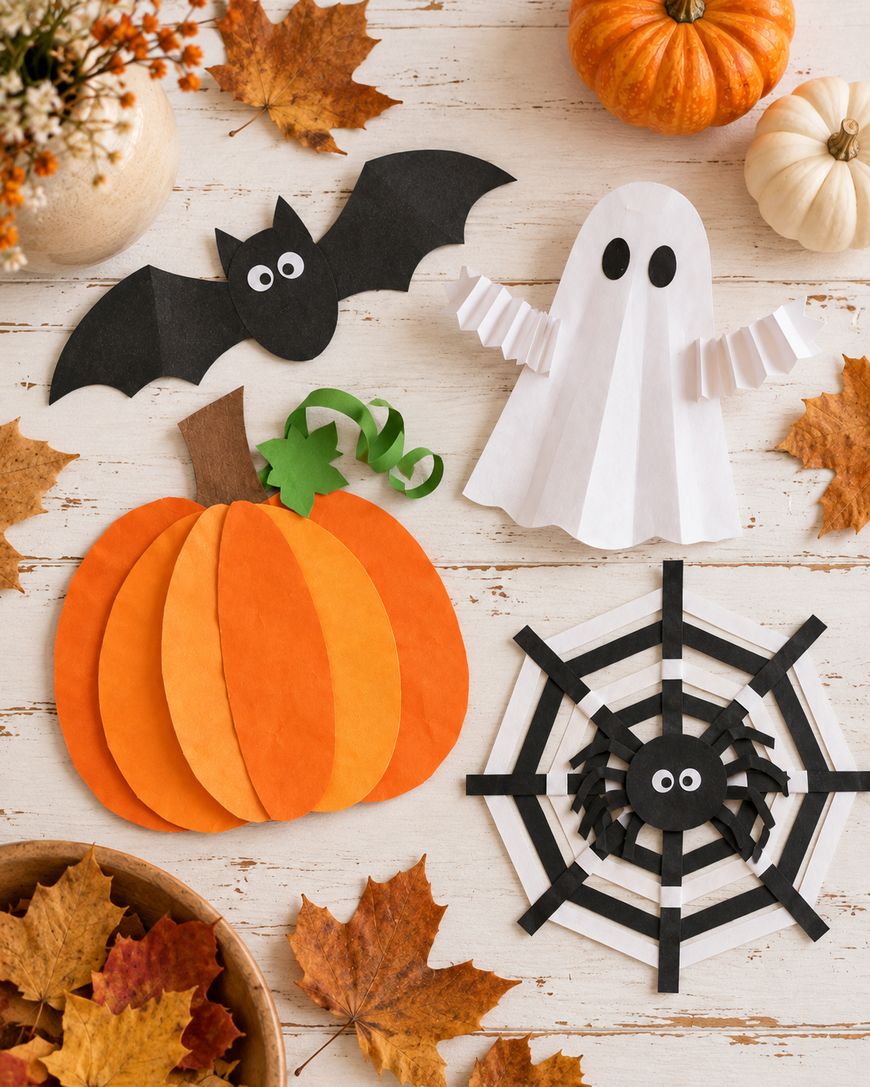
The bold colors suit the season perfectly, since black, orange, and purple already look like Halloween. That means even simple shapes feel festive.
These projects also double as decor, which makes the whole house feel ready for fall. A few paper bats and ghosts can change the mood of a room without costing much.
Best of all, crafting together gives everyone a chance to slow down. You end up with something handmade and a memory that goes with it.
Halloween Construction Paper Crafts Questions
What kind of paper works best for these crafts?
Standard construction paper is perfect for most projects, and it comes in all the Halloween colors. If you want sturdier decorations, use cardstock or glue your finished piece to a backing sheet. Thicker paper holds its shape better when hung.
Can I make these crafts without special tools?
Yes, nearly all of them need only scissors, glue, and a pencil. A ruler helps for the weaving and accordion folds, but you can eyeball strips if you do not have one. Everyday household items like a plate can serve as a circle tracer.
How do I keep the crafts from fading or curling?
Construction paper can fade in direct sunlight, so hang pieces away from bright windows if you want them to last. Use a thin layer of glue to prevent wrinkling and curling. Store finished crafts flat in a folder after the season is over.
Which craft is best for a group or classroom?
The Frankenstein faces and the bat garland work well because everyone can finish quickly and each result looks different. Prepare simple templates ahead of time if you want to speed things up. Kids can then focus on decorating instead of tracing.
How can I make the crafts feel more grown up?
Choose a limited palette like black, white, and gold, and focus on clean shapes and neat edges. Larger versions of the bat garland and web make a stylish display. Framing a finished piece also gives it a polished feel.
Start Your Halloween Construction Paper Crafts Today
Now you have a full set of Halloween construction paper crafts to try, from bats and pumpkins to ghosts and haunted houses. Pick one that sounds fun, gather your paper, and start cutting.
Share your favorites with friends, hang them where everyone can see, and enjoy the cozy fall spirit they bring. Come back next week and make another one.

Leave a Reply